Recent Posts

Everything You Need to Know About Taking Care of Your Extensions


Extensions are the best accessory one can have. They instantly give you confidence and give you the hair you have always dreamed of.  Investing in them can feel like a luxury but with proper care, it can be worth every penny. I have some expert tips on how to choose the right hair extensions on this article.

There are so many factors to consider when having extensions. Factors most people are not aware of like maintenance, proper washing, styling and caring for them.

Just because they look and feel natural does not mean to skimp on the important things that keep them in top shape. Depending on what extension method you have or are considering here are the different types of extension methods and the care that each one needs.

Sew in Hair Extensions

Whether you have a few rows of hair sew in, or a full sew in weave,  the care needed to make them look and feel great will determine their lasting capability. A sew in weave is an extension method where natural hair is braided into a cornrow pattern and hair wefts are sewn directly on to them carefully and securely. An experienced hair stylist will consult with you your options and determine how much hair will be needed to be braided and left out in order to create a flawless install.

People with hair long enough can add just a few rows of extensions strategically to give either length, volume or a color change. Providing the hair texture and the color blend is close to the client’s natural hair, the results can be very realistic.  The purpose of the natural hair is to cover over the hair extension method and blend seamlessly. If the hair is damaged or if the transition to the added extension is too long, layers or shortening the length will be the best option.

With a full sew in weave, a stylist will leave out the perimeter of natural hair and a top section to cover over the braided pattern.  This pattern would hide about 80 percent of the natural hair and the leave out will cover over the top section of hair. Another full sew in weave pattern would braid down 100 percent of the natural hair leaving none left out and directly sewing hair wefts on to the braids.

When washing and caring for each of these methods, it involves careful washing and conditioning. You want the hair to be washed and rinsed in the same direction of the water flow and lathering down the shaft and not piled up on the head. To wash hair and pile up on top of the head in opposite will result in a tangled mess. For clients, washing hair in the shower is the best bet, for shampoo sinks at salons have the same effects. Washing in the kitchen sink upside down is not recommended.

Keratin Bond Extensions

With keratin bond extensions, the extensions are the size of spaghetti with keratin tip already on the top.  The keratin bond looks like half a cylinder with extension hanging from it. An experienced stylist will take a tiny section of hair place it in the center of keratin bond and a special heat tool is used to melt the keratin bond and secure the natural hair between the added extension. The stylist will spin between fingers and form a rice grain sized bond. When all done, hair resembles neat and even sections that look like shoelaces hanging quarter inch from the root. While it is a meticulous process. The results are amazing providing the most undetectable method and versatility in extension methods.

Washing and conditioning are fairly easy as well. Lathering downward and gently, keep the natural hair and extension hair free from having too much to detangle when done.

What needs to be considered is how you detangle and style with this method. A special brush is needed to avoid any tugging or ripping out of hair bond. The plastic bristles are looped to not have an open tip to them. Normal brushes and combs could get stuck between the bond and yank at the hair, which can slide out hair bond or worse pull out extension and natural hair altogether.

When detangling, it is best to start from the tips of the hair and work up to the roots. Maintenance on this method varies but can last anywhere from 3- 6 months. Any longer you risk the hair to become matted and breaking of the natural hair.

Another similar form of this extension is done with beads. Extensions will be applied using tiny beads that will squeeze extension and a tiny section of hair together.  The great thing about this method is that hair can be reused again by unsqueezing the bead and sliding up the hair extension tip back to the root, provided that the hair extension and bead is in great condition. In most cases,just the bead needs to be replaced.

Tape in Hair Extensions

This method is exactly what it sounds like. Tape in hair extensions are approximately 2 inches wide and have a double-sided tape attached to the back of them. They can be cut to size and provide a flat extension method for quick application. Very thin strands get sandwiched in between the tape and get firmly pressed with a needle nose plier to secure the extensions.

While it is a great method for quick application and natural looking locks, they don’t have the flexibility to be able to be put into a slicked ponytail or have the versatility other methods have. When heat styling you want to avoid using heat from the blow dryer or irons near the adhesive. The taped part can melt and risk having the system get loose and slide off. Additionally vigorously washing or having too much conditioner near the taped part can make the tape wet and sticky.

A good thing about tape in hair extensions is they can be re-taped and used again. A solvent will be used to soften the tape adhesive and extension will slide off. The stylist will take the hair extensions and wash off residue and reapply the tape adhesive for re-application.

Cornrows and Box Braids

When having braided styles ranging from cornrow designs and varying size box braids, human or synthetic hair will be used to get the effects. With each method, the designs can be spectacular and can look very similar. With human hair braids, the hair can be heat styled, washed and conditioned as well as flat ironed and curled with heat tools.

With synthetic braids, using heat is not recommended. To be able to get smooth ends or curling of the hair, the synthetic hair will be rolled with perm rods or rollers and dipped in boiling hot water. The synthetic hair conforms to the shape and gives the exact look of heat styling without melting the hair. Since synthetic hair can’t be styled with dry heat styling tools, steam or hot water techniques are more recommended.

Braids are the best protective style one can have. They are great for vacations, protective styles and can be used on children as well. Since hair is blended into braids and hair stays put, there is little to no maintenance as far as styling goes. It is a complete wash and wear style.

Keeping scalp oiled and protected are recommended to keep roots and hair shaft strong while in protective styles. The great advantage of synthetic hair is that it is extremely affordable compared to human hair and can have very similar looks to human hair as well. Seek great braiders that care about the health of your hair and scalp and braid effectively and can make them not too tight in order to help hair grow.

Clip in Hair Extensions

Clip in hair extensions are a temporary measure but are the best type for the chameleon. They can be easily clipped in for a hairstyle and can be removed easily.  The best way to have them last is to avoid way too much heat use on them.  Like all extensions, they can suffer considerable drying out and will need conditioning to retain softness.

I suggest having a few sets of clip in extensions. Ones that you wear when you want to have straight and ones that you wear with waves or curls. When you only have one set and you are constantly washing, blow drying, straightening or curling them they get dull pretty fast.  Having multiple sets to fit the style will prolong the quality of the hair and keep them looking great.
At Home Care of Hair Extensions

At Home Care

When going to sleep,  there are a few options to set your hair at night to avoid any matting or pulling on your extensions. Since we all have different sleeping patterns and we can’t avoid tossing and turning, setting your hair properly will ensure perfect hair when you wake up.

A Doobie Wrap

When you want to maintain straight hair and want to keep hair looking fresh for the next few days a wrap will do a fantastic job keeping it still. What you want to do is divide your hair ear to ear. Then you want to sweep hair from one direction to the other pinning with bobby pins to secure the hair flat. Next, you want to take the ends of the hair and brush in a circular pattern and pinning until all hair is wrapped around your head like a turban. After hair is wrapped you can take a silk scarf and tie around the head to keep hair neat and still while you sleep. When you wake up to untie the scarf remove pins and brush hair thoroughly to reveal smooth straight hair.

Soft Plaits

Another great way to keep hair extensions tangle free and manageable are to either braid one to two braids while you sleep to keep ends of hair tangle free. Part hair down the middle and take the section and braid it down, and then take other section and do the same. Keeping a soft braid will not only keep hair still overnight but will give hair a slight wave when you wake up in the morning.

A High Soft Bun

One of the great tricks I like to do for bouncy waves is to pile hair in the highest ponytail you can create. Secure hair not too tight or close to the scalp. Then you want to take your ends and form a roll from the tips to the fastener. By rolling the ends, you maintain the soft bouncy waves and wake up with perfect hair.

Satin Pillowcase

Not many people know this but cotton and other material pillowcases can snag and create tangles with natural hair and extensions alike, a mistake you want to avoid especially if sleeping with loose hair. Using a satin pillowcase will keep hair soft and hair will slide and not snag and tangle as much.  Using the same techniques to preserve your perfect blow out, in conjunction with a satin pillowcase make for perfect morning hair.

Satin bonnets can be used as well as keeping the hair protected while you sleep. Investing in these satin materials are great for preserving styles and keeping hair condition and hairstyles looking great.

Sulfate-free Shampoo

With many of the different extension methods out there, using appropriate shampoo and conditioner make a world of difference. Keratin bonds and tape in extensions both rely on these shampoos to keep the adhesives intact. Using other shampoos and conditioners can lead to softening of the bonds and tape adhesive used to hold extensions together.

While it is recommended to use salon suggested formulas to get the most optimum results out of the hair, you can find most drugstores and store brands make sulfate-free shampoos and conditioners to keep hair looking fresh clean and intact.

Conditioners

Conditioners are made to effectively detangle and keep hair and extension hair smooth and shiny. Conditioners could also potentially be so soft they can soften and make the bonds loose. You must keep conditioner of any type away from the bonds and tape. Simply keep the conditioner only on the tips of the hair to remove tangles and keep away from roots as well to avoid any extra oil as well.

Additionally, rinse all conditioner out of hair thoroughly. You don’t want the conditioner to seep into the bonds or the braids and create a film of product to weigh hair and hair extensions down.

Combing and Brushing

There are special brushes that effectively detangle extensions and don’t snag and pull on extensions. The bristles on these brushes are looped so that they have no tips to snag the hair. They gently and easily remove tangles and keep hair in optimum shape while extensions are on.

You want to start the brushing from the tips of the hair and work your way up to the top of the head without too much tension. This can take a bit of time, but this careful treatment is what will keep your locks long lasting and keep hair healthy.

Maintenance

You never want to go over the amount of time to keep your extensions on. To do so can lead to damage to your natural hair and create any extra strain on the hair the extensions adhere to. A lot of times, people will attempt to prolong and wait to get a few more weeks out of an extension method but in the long run, it is not worth it.

Most braided extensions with proper care can last for about 3 months with little to no damage. Hair will be removed and natural hair can be washed and deep conditioned for the next install or to let it breathe for a bit.

With keratin bonds, the hair will grow from the roots and will start to sag and weigh natural hair down. More than two  inches of space between roots and bond is too long. Washing, styling, wear and tear can make the hair weak and may get too heavy to hold the bond.

Shedding

Natural hair sheds about 100  strands daily, and when an extensions system is in the hair, the hair that sheds remains on the extension and starts to become too heavy and weigh hair down, which make the hair weak. It is important to check your hair on a daily basis to see how the hair extensions are affecting your hair.

If using extensions to help grow your hair or to use as a protective style, the goal is to keep the hair in optimum shape as it grows.

Keeping the extensions on too long will only make hair weaker and defy the purpose of health in the hair. It’s a great idea to either use clip ins or even wigs in between to nurse hair into great shape. Constantly doing the same extension method in the same pattern will eventually wear your natural hair down and create breakage and weak hair.

Whatever method you choose to augment and alter your tresses,  is a personal preference. They each have their own pros and cons and can make or break your hair.  Make sure to further your research and get recommendations to either get the best extension method and to also know how to properly take care of them as well.
10 Must-Have Tools a Professional Hairstylist Should Own


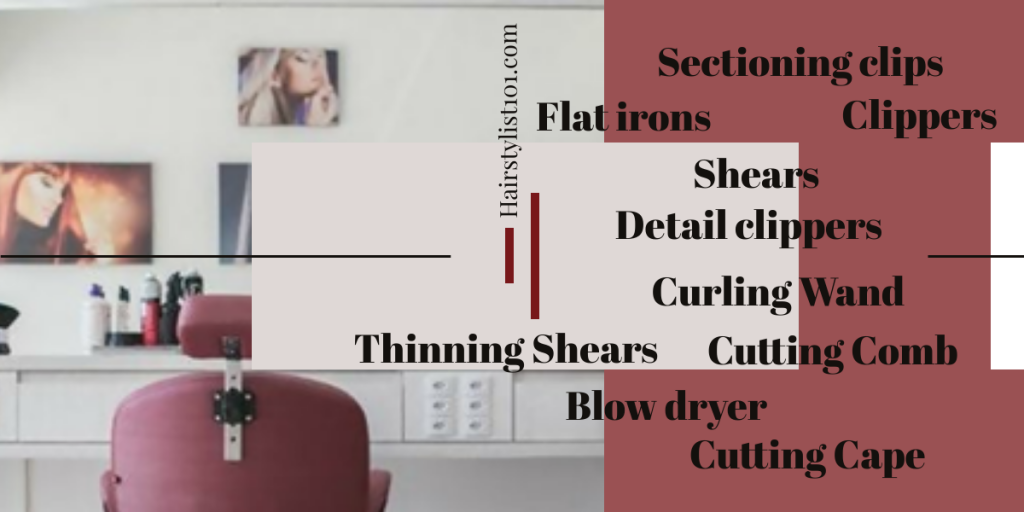
When it comes to creating a variety of hair cuts and styles for men and women, there are certain vital tools that get the job done. Tools that can either alter different shapes and textures and tools that make the hair stylist a true artist. These next top 10  tools are a must to be able to execute many different styling, cutting and coloring techniques.


The 10 must-have tools every professional should own are, a pair of haircutting shears, a pair of thinning shears, a blowdryer, a flat iron, curling wand, hair clippers, detailer clippers, an 8-inch haircutting comb, sectioning clips, and a cutting cape.


These tools are most crucial in the art of hairdressing, styling, and cutting.  They can be used together and in conjunction with each other to create an array of different looks and create a multitude of different looks. Each has its own special reason for being important in the art of hairdressing and when one goes or breaks down it will be needed to be replaced to continue to serve in a busy environment. When starting out, these top 10 are going to be the most important tools you will need to build your professional career.

You will be prepared to tackle any texture any haircut and any style. The tools will be explained as to why they are needed and when you are to use them to create the look your client is asking for.

While products, coloring supplies,  and chemicals are just as important in the hair transformation the main focus will be to explain the uses of the top 10 tools.  Without these tools creating, cutting, and styling won’t be the same and it is important to know why.

1. Shears

Haircutting shears are the tool that cuts the hair and sets the base for the new look. Shears can come in many sizes and are made from many different materials and are ergonomically designed for right and left-handed stylist. They instantly change a look and can give confidence to someone looking for a change, create major makeover moments or just keep hair in a neatly trimmed fashion.

The size of the shears is a personal preference for the professional. A shorter blade shear will use frequent strokes to cut while a longer blade shear will cut a section in one shot.   When purchasing great professional shears, German and Japanese steel are the top leaders for great shears. Shears can also come indifferent colors and designs to fit the hairstylist choice and needs.

Shears are probably the most expensive of your professional investment but will be worth every penny spent. Shears can range from $25- 500 USD and even more than that. When starting out try not to spend too much money on them because caring for them will be the biggest lesson. dropping them can be crucial and create nicks in the blade that can ruin them. An experienced blade sharpener can fix them but good blade sharpeners are hard to find.  It will be devastating ruining an expensive pair so gain experience first and then invest in more quality shears as you grow and as your experience grows.

2. Thinning Shears

Thinning shears are the tools that reduces the thickness and creates texture in hair cuts. With a comb blade on one side and a blade on the other, this tool is a must to detail designs in haircutting.  When using to remove bulk from hair the stylist will strategically use this shear to eliminate unwanted thickness. Using this tool at the root creates the most disappearing of effects for the thickest heads of hair. When using on bulky sections where softer textured looks are desired, a stylist will remove bulk from half the hair shaft down to create height but discreet movement in the hair.

Another great way to use thinning shears is after a blow dry to feather and detail tips of the hair and remove mild thickness and keep hair full but soft with a grown out razored look. This tool can be used wet or dry and can make the thickest heads of hair more manageable and wearable for a specific look. Thinning shears are also used on barbering techniques removing harsh lines and creating flawless blending transitioning from clipper cuts to longer looks as well.

Like haircutting shears keeping them safe from falling on the ground is the key to keeping expensive cutting tools in optimum shape. As you grow in your career and when you know how to take care of them you can invest in more expensive and sharp cutting tools

3. Blow Dryer

A great blow dryer will not only alter strands but will quickly dry hair into the shape needed to complete the look. A blowdryer can straighten out curly locks, smooth out frizzy hair and can add height to flat lifeless hair.

Before the use of blow dryers, it was impossible to have the fast results we crave. You can physically cut dry and style in under an hour. Prior to handheld blow dryers, air drying or hooded dryers were used to dry looks which took forever. The birth of the blow dryer cut time considerably and gave clients the instant gratification they were looking for. Not to mention the natural look they crave.

The blow dryer I prefer is one that has fast speed and had has different heat settings for different textures.  The one that has served all my needs to blow dry very curly hair to straight textures is the Porcelain Ceramic by Babyliss Professional. The hottest setting can straighten even the tightest curly hair, however, you must know how to blow dry properly to not create heat discomfort or burn the hair. You must know how to maneuver the blowdryer to work effectively. By setting the blow dryer to gentler heat setting, you can easily give straight hair the polish it needs without the heat.

Also, it is very important you use the nozzle attachment that comes with the blow dryer to prevent any scorching of the hair. Using the blow dryer with the attachment can leave grill marks on the hair or worse break hair off.

4. Flat Irons

Flat irons are the tool that gives you super straight flat looks the hair trends require. Flat irons are responsible for the sleek polish extra curly hair needs to maintain straight hair.  They should be used on dry hair only and should be used sparingly to avoid excessive heat damage. slow controlled strokes need only 1-2 passes of the tool. Going over strands quickly and more than 5 strokes are unnecessary. They create severe heat damage and cause hair to break from overexposure to high heat. Also holding on a spot too long can create breakage and can pop off especially if the heat setting is set on high for delicate hair.

The Nano Titanium by Babyliss Pro-1-inch Flat Iron is my iron of choice . With a variety of heat settings, you can straighten the curliest of hair that needs more heat. The heat settings can also be reduced to cater to fragile, color-treated or delicate hair that needs little to minimal heat the fact that that heat setting can be altered is what makes this iron great. The hotter setting does not mean the better setting or more straightening.

Flat irons can also be used to curl hair as well. With a 180  twist of the wrist then sliding down can make curls and waves as well making the flat iron a must for hair professionals. Bigger plate irons can be used as well still creating bigger waves and straight as well, but I find the one-inch model to detail hairlines, nape hair and getting super close to the scalp more easier with a thinner 1-inch model.

5. Curling Wand

Curling wands are a fantastic tool when beach waves and curls are needed for specific looks.  They can make straight hair have a messy tousled look or make it have a tight curly look by how you wrap sections on iron.  It is also very easy for clients to recreate the looks as well

For loose curls and waves wrap hair a few inches away from roots and ends for a beachy softer look. For a more curly and spiral looking effects wrap sections from roots to tips. Since the tool requires you to get very close to roots and tips, gloves can be used to protect fingers from getting burned.

Furthermore, curling wands help make hair look fuller and give a straight hair another option to create a multitude of looks. wands can vary in sizes and some models can be cone shaped for tapered curls and waves. My preferred wand is the 1-inch Jose Eber curling wand. It heats up immediately and makes curls in seconds. For shorter hair or delicate tresses 5 seconds or less is ideal.  Leaving on too long can result in too tight of a look or to much heat for fragile hair. Very long or strong virgin hair does best from 10- 15 seconds depending on the texture.


Must Have Tools for Hairstylists


6. Clippers

Clippers are used by barbers and stylist when close even effects are needed for different looks. Most commonly used for fading undercuts and close military cuts.  Clippers quickly cut hair and leave hair in an even canvas.

Clippers use attachment guards that regulate different lengths for varying looks. The attachment guards can be as big as 2 inches and be as tight as 1/8 of an inch.  Lighter hair can appear shorter so depending on the look desired to start off a bit longer and bring shorter if needed. Also, thinner hair can appear very short as well when cut with clippers so start off with larger attachments.

My favorite model of clippers is the Wahl Senior. It has a power cord that keeps the speed consistent and color-coded plastic attachments to regulate the different sizes and has been a stylists’ and barbers’ favorite for years. Some models come cordless which require you to keep them charged, however, I prefer the consistency of the power cord version.

 7. Detailer Clippers

These clippers are what makes the effects of barbering and detailing professional and crisp. Detailers can be used to define sideburns,  square or round out necklines or stencil in effects in the hair. They are the closest cutting you can get with a clipper. These can also be used when a bald look is wanted to leave you clean to the scalp.

Detailers can also be called edgers, outliners, and finishers. There are many models and different companies available. The leaders in these close cut clippers with an exceptional reputation and preferred by barbers and stylist alike are the models by Andis, Oster, and Wahl.

8. Cutting Comb

A cutting comb is a sturdy 8-inch comb used to carve out sections and to detangle sections of hair. The comb is used to create uniform sections to cut and to create various shapes in haircutting.

When using these combs they allow you to get clean tight sections and separate the hair you are working with from the hair you want to leave alone. A cutting comb can be used to detangle as well which is needed after a good wash and condition.

Combs is the wand to the hair and manipulate what direction to move hair too. Combs can be used to slick wet hair back into a tight ponytail and used to guard where to cut for bob cut effects on the nape. Combs are used by barbers, stylist, and braiders. Without them, neat and concise work would not be possible. Combs are used for clipper over comb cutting techniques and keep even sections when cutting short hair as well. Layering hair is also made possible by the use of a comb. Gliding pie sections into many different degrees for different layering techniques.  When used for braiding the comb allows you to keep sections you are working with to remain perfect and allow you to section in straight lines circular patterns and zigzag effects.

9. Sectioning Clips

Sectioning clips are needed when working on designated areas. They are used in haircutting, styling, coloring, highlighting blowdrying and anywhere where you need to keep the hair you are working with separate from the hair you are not working g with.

Sectioning clips allow you to stay in a designated area and keep working in a section neat from any other hair distractions. Using sectioning clips when blowdrying keep the wet hair neatly sectioned off from the dry hair you are blow drying.  When using for chemical work as well, it keeps the hair you are treating away from the hair that will be treated next. Sectioning clips provide you a great hold to keep work neat and allow for full detailing on sections you are working on

Sectioning clips can come in large plastic clips, medium curved jagged claw clips and aluminum duckbill clips. Some jagged clips can have an extra jagged claw as well to grip very thick hair as well.

Bigger softer clips are used with chemical treatments and are soft to be able to pull and drop sections easily without having to use your other hand. The medium sized sectioning clips with the jagged claw are used to keep sections tight and away while working but require you to disassemble and re-wrap for tight sectioning again.

The aluminum duckbill clips are used for fine thin hair separation and styling and also for holding a thermal curl in place. a stylist will take a section curl with a curling iron or curling wand and secure sections in a pin curl to cool. Using the duckbill sectioning clip will keep the curl tight and in place until it cools down. Once it cools down the sectioning duckbill clip will be removed to reveal a longlasting curl pattern.

10. Cutting Cape

Cutting cape will be used to keep the client protected from having hair fall on their clothes and to keep products and tools from contact with the client. Capes also make the client remain calm and relaxed while you work on them.

Capes can come in many different materials. Vinyl ones are used for shampooing. plastic ones are used for coloring and keeping capes durable for multi-use and protecting clients clothes underneath. Durable waterproof fabric materials are used for cutting capes to keep clients dry and comfortable during wet haircuts and blow-dries when wet sections rest on shoulders. One that I recommend is Betty Dain Super Size Barber Cutting/Styling Cape.

Capes are the ultimate professional tool and are synonymous with professional salon work in all aspects.

These top 10  tools, you are the best and most needed tools for the professional stylist. With these tools, you will be able to do most any hair texture and any haircut possible. The heat tools are also great for altering all textures and creating the opposite texture for each client. You can do men’s hair cutting and you can style hair professionally in many ways.

If you’d like to see a full list of my recommended hair tools and accessories (and why I loved them!) You can check them here.


Step by Step Guide on How to Bleach Your Hair and Achieve the Perfect Blonde


There comes a time in our lives that we are looking for a change. For many women, it can be something as simple as changing your hair cut or your hair color. One color that never goes out of style is blonde. From the platinum blonde locks popularized by Marilyn Monroe to Blake Lively’s “bronde” hair color, there are many options you can make. A trip to the salon can help you achieve that, but you can always learn how to bleach your hair yourself.


How to Bleach Hair at Home

You don’t need to shell out lots of money just to achieve blond hair. It is possible to bleach your hair at home if you have the right tools and knowledge.

You need to keep in mind though, that it is quite tedious. Bleaching your hair can take a lot of time, most especially when you have dark hair, to begin with. There are some hair types and colors that can easily absorb the bleach and hair color. But there are also some hair types that would take hours and multiple sessions in order to achieve the perfect color. If you don’t mind doing the research and if you are patient enough, bleaching your hair at home can be easy. All you need to learn are the basic rules and you can get the perfect blond hair in no time. Take a look at the tips below on how you can prepare for your first hair bleaching session at home.


Prepare Your Supplies

You only need a few things and you’ll be ready to go. Of course, you need to have your bleaching powder and the developer or peroxide. You need to make sure that you are buying from a reputable brand. If you try to skimp and buy from cheaper and unknown brands, you might end up with severely damaged hair.

As for the developer, there are different volumes ranging from 10-40. You may choose what will work best for your hair. The numbers stand for just how strong the chemical is. The higher the volume is, the stronger it will be.

If you have really dark hair, you should not choose the lowest percentage because it will just fail. But choosing the highest volume can also be dangerous especially if you leave it on your hair for too long. The safest you can choose is 20 or 30, but with dark hair, it would take multiple sessions in order to get the blonde color that you are looking for.


Prepare Your Hair

If you have been doing your research, then you know that bleaching works best with virgin hair. That means you should not have had any treatment done to your hair for at least three months prior to getting it bleached.

If you have just undergone some treatments like Brazilian blowdry or rebonding, you should wait until after three months have passed. If you try to bleach it would get too damaged. If your hair is ready to undergo bleaching at home, then what you need to do is condition it first before bleaching. Skip the hair iron and use sulfate-free shampoo so that your hair will be moisturized.

You can use coconut oil to condition your hair. Start using it at least two weeks before you bleach your hair. It’s a great way to moisturize and condition your hair. This is needed as the process of bleaching can be very drying and without enough moisture, your hair will get damaged.


Choose the Right Shade of Blonde

Now that you know how to bleach hair, it’s time to choose the right shade of blonde. Many people do not realize that there are so many shades of blonde you can choose from. In fact, here’s a gallery showing that you can choose from over 40 shades of this beloved color!

So how do you determine which shade of blonde is right for you? You need to consider your skin tone. While you always have the prerogative to choose which shade you want, you would want to achieve a good balance so that it does not look unnatural on you.

One advice is to choose a tone opposite of your skin’s undertones. You can look at your wrist to see the color of your veins. Warm tones are for those with green veins, while cool tones belong to those with blue and purple veins.

Cool blonde colors such as platinum and ash work great for those with porcelain skin while warm blonde shades like caramel, honey and butterscotch are perfect for those with fair skin.One thing you can do is to look for celebrities that have the same skin tone as you do. Check out which shades they are sporting and then you can start doing your research on how you can achieve that same shade for your hair.

Step by Step Guide to Blonding Hair


Guide to Blonde Hair

1. Test the product first for allergic reactions

If it is your first time to bleach your hair, do not ever skip this step. You will never know how your skin will react to the ingredients, so doing this step will save you from a serious skin allergy, or worse.

You just need to take a small volume of the bleach solution and apply it behind your ear. If you do not see any allergic reaction, rash or burning for about 48 hours, then it is safe to use. If there is a reaction, then you need to look for an alternative way of how to bleach your hair.


2. Divide your hair into sections

Use hair clips so that you can divide your hair into sections. Don’t just try to apply the solution randomly as this can result in uneven colors. It also makes it easier to apply the solution to the hard to reach places, such as the back of your hair.


3. Apply the bleach, starting with the lower sections first

Now you just need to combine the bleach powder and the developer. Make sure to mix it thoroughly. Follow the instructions that come with the package. Make sure you use gloves and that you are wearing old clothes when you start bleaching your hair.

Experts say that compared to the roots, the tips of your hair take longer to bleach. What you should do is apply the bleaching solution to the bottom sections of your hair first before doing the middle. After around 20 minutes, you can now apply your solution to the roots. Cover your hair with a shower cap once you are done applying the solution.


4. Leave the bleach on for the time stated on the package

Now it’s time to just relax and wait for the bleach and developer to do its work! But make sure you do not take a nap while waiting! You cannot leave the bleach for more than 45 minutes as it will cause your hair to get too dry.

You can check the color from time to time to see if it is already the color that you want. If you had lighter hair, to begin with, you may not have to wait long for that blonde color.

But if you are starting with dark brown or black hair, don’t be surprised if your hair just turns orange after one session of bleaching. You will need two or even more sessions of bleaching your hair before you will see the blonde color you want.


5. Rinse your hair and make sure to care for it

Once the proper time has elapsed, rinse your hair. Do not shorten this time as you will really need to make sure that all the solution is washed away. Make sure to condition your hair too so that you can regain some moisture on it.

Bleaching Hair Mistakes to Avoid


Bleaching Mistakes to Avoid

Part of knowing how to bleach hair is knowing which mistakes to avoid. One is that you should not try to bleach your hair alone, especially if it is your first time. Get a friend to help you so that you will not miss any spot, etc.

Another mistake that most people make is not waiting for enough time before bleaching their hair again. We have already stated that it can be a tedious process, and it will not do you good to be impatient. If you have dark hair, you will need more than one bleaching session.

But do take note that you will need to wait for at least four to six weeks before the next bleaching session. If you try to do it too frequently, your hair will suffer and get severely damaged. While waiting for the next hair session, just make sure your hair is properly conditioned and moisturized.


Aftercare

Congratulations, now you have achieved that blonde hair you have been longing for. Now you just need to make sure that your hair stays healthy. It won’t t matter that you have achieved the perfect hair color if your hair looks brittle and dry.

Keep your hair hydrated by using hair masks and conditioners frequently.


The Ultimate Guide To Cutting Hair Faster and Getting More Clients!


If you are a beginner, you might have noticed how strict some customers are with time. Hence, you now find yourself looking for tips on how to cut hair faster. Don’t worry, because most beginners struggle with the same problem – how to speed up the process without compromising quality.

You sure don’t want to be labeled as a slow hair stylist, as this can hurt especially when building your clientele. Always keep in mind that the best and easiest way to master hair cutting is to perfect basic techniques.

Hair cutting techniques and tips

In addition, you can improve your skills on how to cut hair faster by following tips below. All you need to do is to keep on practicing because as we all know, practice makes perfect. Or in this case, practice makes cutting faster.

Now, let’s start discussing the tips to improve your skills as a hairdresser.


Tip #1 Use the right tools

This is the most basic knowledge any hairstylist should have, and also the most important. Using the right tools will not only help you achieve the perfect cut, but it will also save you a ton of time.

On the other hand, not knowing which hair cutting tool to use could cost you a lot – time, effort and even your client. So the number one rule is to master the use of cutting tools by heart.


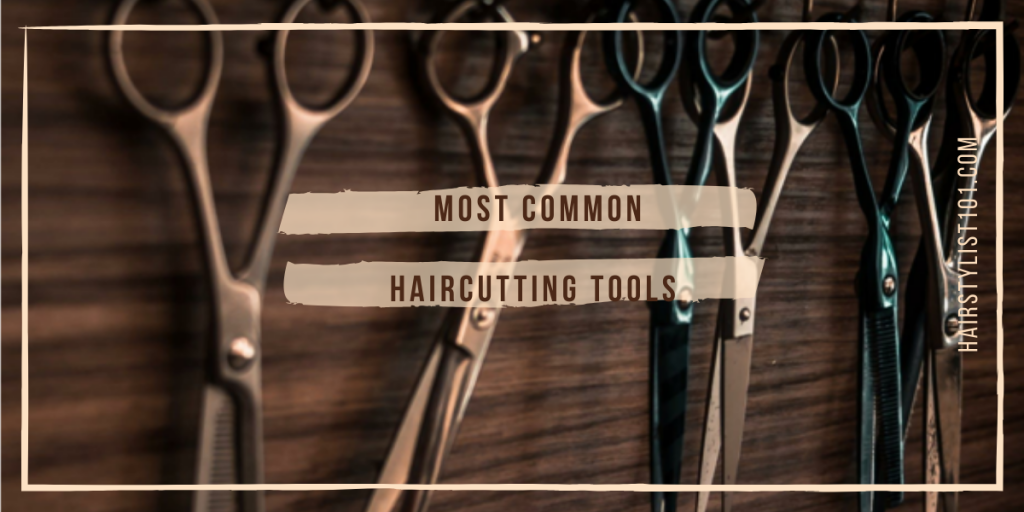
Most Common Haircutting Tools

Haircutting shears

This is sharper than your common scissors, and specifically designed for haircutting. You have to master the art of holding this properly.

Thinning shears

Also called texturizing shears, its main function is to thin or texturize the hair. Thinning shears only cut about half of the hair. Instead of having two regular blades, one side (sometimes both) is replaced with teeth blades that look like a comb.


Haircutting razors

Did you know that you can use razors to cut both men and women’s hair? Razors are usually used for thinning the ends and creating textured hair.

Hair clippers

The key to using hair clippers is knowing when to use the guards or blade attachments. Basically, the longer the hair, the longer the blade to be used. Start cutting from the base of the head moving to the top.

Cutting Combs

Cutting combs are the perfect aid to cutting shears. A good hairstylist would have a wide collection of cutting and razor combs consisting of different sizes for various uses.

Tip #2 Master hair cutting techniques

The main goal of every hairstylist is to make their customers loyal. To do this, your client must both look and feel good after the service.

Sometimes, clients leave all the discretion to you as their hairstylist, However, a lot of clients also have a specific style in mind. Your goal is to do according to their instructions.

If you have a great mastery of haircutting techniques, not only would you be able to cut hair faster, but you could also give tips and style suggestions confidently.


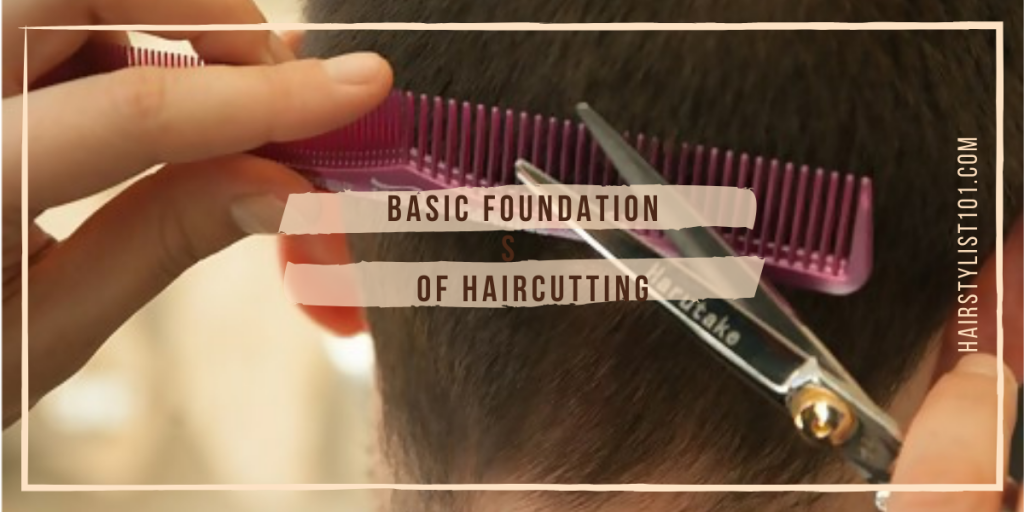
Basic Foundations of Hair cutting

Texturizing the hair

Texturizing is simply the layering of hair so as not to look flat and lifeless. This is perfect if the client is looking for a casual look. This also looks great for those who want to cover part of their thinning hair, as added texture gives a thicker effect on the hair.

Expert hacks:

One of the most common ways to do this is by twisting the hair and gently cutting it using a razor. It is better if you could practice how to texturize hair using shears, razors, or both. Use hair wax in styling to help achieve the desired look.

Slide cutting

This is a cutting technique wherein you glide or slide the fingers and slightly opened shears along the edge of the hair. It is also called slithering, ultimately removing the bulk of the client’s hair.

Expert hacks:

Make sure to have steady fingers. This method works best for clients with long and straight to wavy hair. Never use this for those with curly hair.

Point cutting

This is a method of adding texture to the hair by cutting it vertically. Hair is divided into thin sections and held up at an angle before cutting. This works best for clients with short hair.

Expert hacks:

The goal of this cutting technique is to add texture, not remove length, so patience is key. One of the tips to cut hair faster using this technique is to slightly tilt the shears to remove more hair. However, be careful not to cut yourself.


Shear-over-comb

As the name suggests, the comb is used to hold the hair while the tips of the shears are placed over the comb. Proper comb placement is essential in this cutting method. By applying this technique, stylists are able to cut hair from very close distance to the head.

Expert hacks:

Use shears with longer blades. Try to stand at either side of your client, and not directly behind to get the full view. You must know when to apply horizontal, vertical or diagonal comb angles.

Smooth cutting

Smooth cutting is basically thinning hair using a professional haircutting razor. It is almost similar to the slithering or slide cutting technique, except for the tool required.

Expert hacks:

To cut hair faster in this method, tips include having steady and light hands. You must have full control to avoid chopping off the entire segment of hair that you are holding.


Tip #3 Be updated on the latest hair trends


A good hairstylist is always updated with the latest trends. One of the best tips to cut hair faster is to be familiar with various cuts and styles because you would already know what tools and techniques to use.

Popular Haircuts for Men

When it comes to grooming men’s hair, there is very little room for error. Men usually stick to their favorite barber so you have to know what they want and do it right the first time.

Undercut

This is a haircut in which the upper part of the head has long and parted hair, while the lower part is shaved or kept very short. You will be using blades or razors, clippers, and shears.


Pompadour

Picture Elvis Presley and you now have an idea of what a pompadour hairstyle is. Your client may ask for either a classic take on this look or a modern extreme version. The latter is done with the lower part of the head being shaved to make the look more catchy.

Buzz Cut

Some men prefer the buzz cut as very short hair means low maintenance styling. It is a classic haircut and also great for those with receding hairlines. Use hair clippers with the right guard size.

Helpful notes


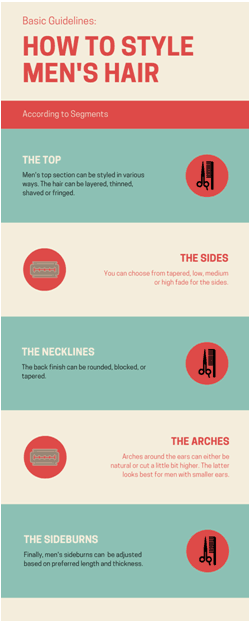
When deciding how to cut men’s hair, helpful tips to do it faster include styling according to segments.

For instance, the top part of the hair can be layered, thinned, or razored.

The neckline can be rounded, blocked, or tapered.

The cut for the arches can follow its natural position or can be a bit higher.

For the sideburns, the length can vary from top to bottom of the ear. Just ask your client what he prefers.


Popular Haircuts for Women

Popular Haircut for Women

Most women have long hair, so as a women’s hairstylist, you have more room for creativity. Right now, there are a lot of tips on how to achieve different hair shapes and cut hair faster.

Again, it helps if you know the basic and most common haircuts. You can give the look a different feel by adding twists here and there.

Layered Hair

Easily the most popular hairstyle for women because it gives the effect of a longer and more voluminous hair. As the name suggests, you will cut the hair into layers. The hair at the back layers is the longest while the hair gets shorter as you go to the top.

To cut layered hair faster, the best tips would be to divide hair into segments and cut it using blended elevation.

Shaggy Hair

Shaggy literally means unkempt. In haircutting, this translates to unbrushed, care-free hairstyle.

Shaggy hair is also characterized by layers, but what makes it different from the layered hairstyle is the length. So when someone mentions a shaggy hairstyle, picture short to mid-length (up to the shoulders) hair.

Blunt Cut

This refers to a straight cut. While it seems pretty straightforward, it is actually not that easy to execute. The key to cut straight hair faster lies on holding the shears precisely so follow expert tips and keep on practicing.

Pixie Cut

For women looking for edgy hairstyles, you could suggest a very short hairstyle know as the pixie cut. To make sure your client would look good with this cut, you have to know and understand her face shape.

Be creative by adding bangs or fringes, a shaved undercut, or even adding highlights to the hair.

Bangs

Every now and then, a client would request for bangs or fringes. Worry not, because there are various types of bangs that could work well with different face shapes.

Full, side-swept, blunt, micro, parted, and wispy bangs are just a few styles that you could master. Tips to cut bangs faster include knowing how to frame the face and cut the hair at an angle.


How to become a better hairstylist?


How To Become a Better Hairstyli

Now that we’ve discussed the tips to cut hair faster, we need to go to the details of becoming a better hairstylist. Let’s face it, there is always a room for improvement no matter how good you are right now.

Continuous training

Take formal classes on advanced haircutting techniques. There are a lot of barber schools or hairstyling schools to choose from. You can even display your certificates as proof of your hairdressing skills and abilities.

On the other hand, informal classes can be done with a group of friends or co-workers. Think of it as a fun practice and learning session. Keep in mind that you can always gain something from training – new skills and new friends!

Invest in haircutting tools and equipment

If you can afford quality tools, don’t skimp on it! Just think about how many times you are going to use that pair of shears or electric clippers.

It is also better to invest in quality tools that can last for years instead of having to buy new ones every so often. Read reviews on different brands before deciding which to buy to get the best out of your money.

Be up to date with fashion

We can not stress this point enough! Knowing the latest trends in fashion will give you an edge as a hairstylist. Clients would be disappointed if the hairstylist is not familiar with the requested hairstyle.

Remember that clients do not choose stylists just based on who can cut hair faster, but they also prefer those who give tips on something new for them to try.

Develop people skills

As a hairstylist, you don’t want to be too intimidating to clients that they become afraid to ask for what they want. Try to maintain a friendly atmosphere while doing the service. Your goal is to make your clients feel relaxed and comfortable.

Be professional

In trying to be friendly with your client, being professional is something that you need to work hard on. Remember your boundaries and don’t snoop too much on your client’s lives.

Let them talk to you but don’t ask leading and intriguing questions. Some clients would also prefer a quiet environment. Give them the best service from consultation to the actual haircutting session.

Being professional also means that you are available on the scheduled appointment. Don’t be late or make sudden cancellations.

Listen to your client

To be able to give the best service, you have to actually listen to your client. Take time to understand how they take care of their hair, what their problems are, and what kind of styling they want to do achieve.

Only after listening should you give your opinions and suggestions about their hair. Lastly, the client still has the final say.

Love what you do

Clients can sense if you like what you are doing. Normally, if you are passionate about your work, you are also able to give better customer service. This passion will also motivate you to keep on improving your craft.


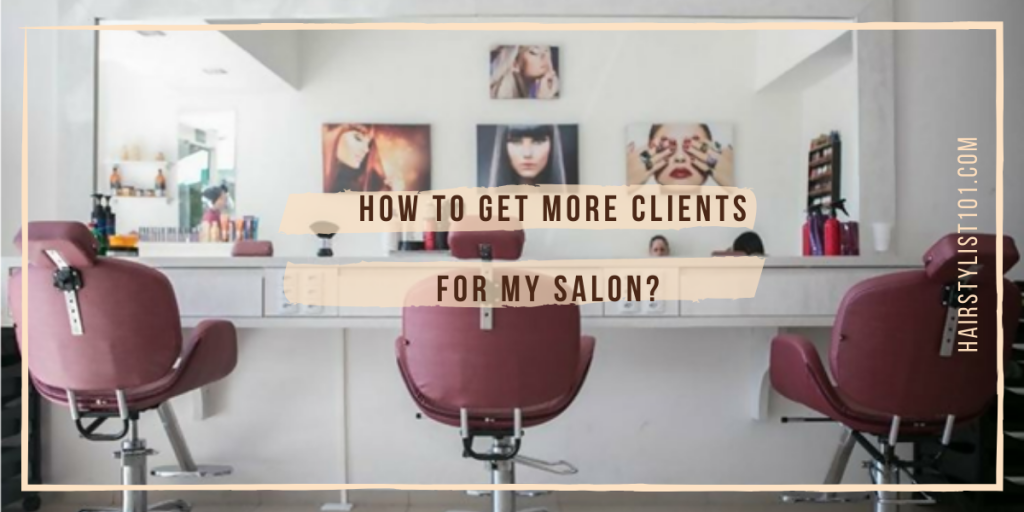
How to get more clients for my salon?


How To Get More Clients for my salon

If you are a business owner, you probably are searching for tips to cut hair faster and how to become better hairdressers because ultimately, your goal is to have a jam-packed salon with a solid customer base.

However, not everything depends on the skills and speed of hairdressers. It is also very important to have a good marketing campaign. Here are some tips on how to attract more clients.

Promotion

There are two types of promotion. The first one is called organic or word-of-mouth promotion. This is highly dependent on the level of satisfaction of clients, and if they are willing to tell others about it.

The second one is inorganic and comes with a cost. One of the most popular ways to promote is the introduction of loyalty cards to customers. They get perks for being loyal so it is a win-win situation for both parties.

Another option is to sponsor a local fashion show. Offer to do the hairstyles of the participants for free or with a huge discount. Make sure that the name of the salon is listed in the official posters and other promotional materials.

To get more people to try the salon, offer discounts or packages for two or more people coming together. Alternatively, give rewards to old clients who bring in new customers.

Utilize social media

It is important to have an active Facebook page for the salon. People leave reviews and ratings to the page so the customer service both in the actual and online world should be great.

In Instagram, remember to always post professional-looking photos. If the hair photos look great, more people will notice and be aware of the services.

Learn when it is best to post photos to get higher reach and the most reactions from people online. Don’t forget to use relevant hashtags in all posts.

Find your specialty

It is best to find a niche or specialty that you can offer to clients. You can specialize in doing bridal looks and offer wedding packages. This way, your salon will always be an option whenever there is a wedding.

You can also specialize in doing hair colors. Market the salon as the best place to visit for balayage hair. With the help of social media, expect more people to come in.

Do not overcharge

Sometimes, going to the salon is a luxury. Good hairstylists can command their rates but make sure that it is on par with competitors.

Salons that deliver good quality work at an affordable price is likely to get more repeat customers. If there is really a need to increase fees, do it gradually.


Short Hairstyles: What you need to know


If you’ve been contemplating on cutting your hair short for a while now, this may be the day you get to decide to do it or not.

In this article, I’d like to share with you things you should know (and consider). We’ll cover everything from face shapes, to hair texture, to hair color and we’ll get into styling. We will also talk about the reasons “why” you’d like to cut your hair.

Short hair is a commitment as you will need to learn how to restyle your hair.

You must train your hair by doing different techniques. When you cut your hair very short from being long the styling is much different than your new regimen. that may include using smaller brushes.  Using Different types of products and implementing different hair habits. Short hair cuts have a variety of names you can use to reference the look. Names like pixie, short shaggy layers or a chin length bob can all be different versions of short hair.

A pixie being a short round cut 3 inches all around. Can be carved out by the ears accentuating cheekbones and graduated in the nape to flatter the neck. Shaggy short layers can add movement and give body to a pixie or a bob cut. And chin-length bob cut, where all the hair is cut at the chin for a short but edgy blunt cut.

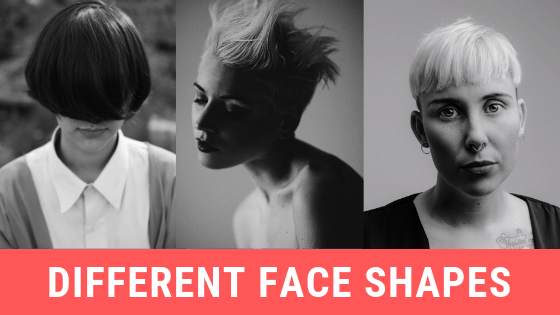
Different Face Shapes

Different hair cuts flatter different face shapes and certain angles flatter different people.

The most ideal face shape for any hair cut is the oval face shape. The symmetry in an oval face shape can carry many different hairstyles including short.Face Shapes

It doesn’t mean you can’t have certain hair cuts for different face shapes, it just might be that certain features would be accentuated. Like full cheeks, prominent chin, or high forehead. Certain tweaks in a hair cut can personalize each cut to flatter many face shapes. maybe you need more sweeping longer bangs or the edges of a cut would be longer to frame full cheeks and longer face shapes.

The texture will play a part in the hair cut and styling aspect and what products will work best for your hair type. Since naturally, straight hair can get spiky if cut too short knowing how to work this length will be the trick. Wavy or curly hair will have a softer look but if an edgy straighter look is desired a heat tool would need to be used to create the effect.

Some shapes are cut to flatter wavy and curly hair types and require little to no styling just applying a cream or a mousse or gel product to air dry. Round face shapes can flatter from short hairstyles if you consider having shaggy bangs to detail the cut. Having face-framing bangs that sweep cut across the face gives the illusion of more balance and gives the appearance of a more structured jawline.

If your daring and don’t mind micro cropped bangs they can be a great additive to fine hair.

Keeping the hair ultra short can give the hair more volume by reducing weight and cutting off stringy locks. If your hair is thick it might need to get considerably thinned out or reduce volume by strategically removing bulk to make thick hair appear more balanced.

Techniques to thin out can be done with a fine or wide tooth thinning shears. A razor can be used as well to reduce the bulk. Razor cutting is a bit tricky, make sure your stylist knows how and where to use the techniques to as well. Also don’t be afraid of saying you need more bulk removed. Stylists would rather you guide them into what feels comfortable.

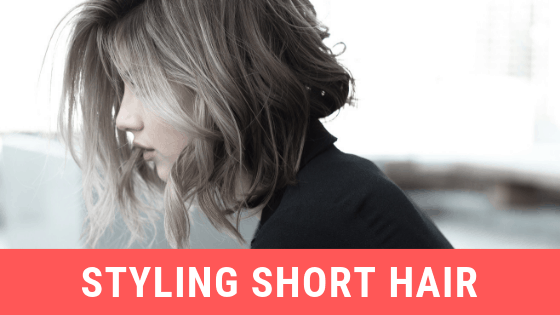
Hairstyling

When it comes to styling short hair different types of techniques will get the job done.

You cant style your hair the same way you did when you had long hair. The same tools that work for long hair do not work for shorter cuts.

Like large brushes and hair ties. It also may be that you wake up with bed head every morning. Short hair needs weight to fall smoother and if you sleep and toss and turn a lot your hair will wake up looking funny. It may be likely you will need to rewash or rinse your hair to make it lay a certain way.

Blow-drying short hair is much different than blow drying long hair.

A short haircut does not have weight so you must manipulate to get the effect of the cut. short hairstyles require little to no blow drying. The mere technique is to follow your natural hair flow. If you like to wear a deep side part. Part your hair and dry in the direction of the hair flow. Cutting your hair to flow with your natural hair growth will keep your styling much easier. Cutting or styling against the natural flow could make the style feel uneven or not flatter.

Using the blow dryer as well will help style it and design the shape needed to style the look. By blow-drying wet hair into its new shape, the use of your fingers or a smaller brush can aid you in getting the right look.

A little pomade or texture paste can make a short hair cut look cool chic, the product helps separate and give a rugged look. Fine straight textures hardly need too many products, instead use a bit of hairspray after blow drying to keep the hair full with volume and skip the heavy products to avoid flat hair.

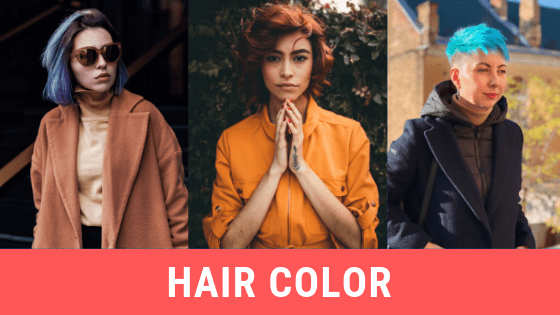
Hair Color

Any length 3 inches or below flatters most those with bold single process colors , rich dark color, vibrant reds or full-blown blond and natural grey hair.

Highlights do not flatter because the shape is too short. Once hair has a longer bang or lengths surpassing 4 inches than highlighted effects can be introduced.

The hair will lie in place and the streaking colors flatter the lines. Pixie cuts that are 2 inches short attempting to have highlights will end up looking more like spots. The color will stand out like a mistake and will not be flattering at all.

If you have a head of gray hair and have a short haircut the cut alone will make grey strands appear chic.

If the color is desired there are many options you can choose from. You can use semi-permanent color and get many different shades that can pigment into grey hair. Basic browns to make it look sandy or full-blown reds and blues to make the grey hair pop.

Short hair has a way to make any hair color look good. By experimenting on short hair,  hair color effects last as long as the hair is not cut

Try it on

Did you ever crave a pixie or ever thought about how a short hair cut would look like on you? To be fun and carefree and just bold? Try on a wig.

There are many beauty supply stores and wig shops that carry wigs and allow you to try on wigs with the purchase of a wig cap. The great thing is you can try on a certain short shape and a different color to get a feel for the look or the color. It’s a great way to see yourself and truly picture what a short look really looks like on you.

You will either know for sure if its something you would consider or know for sure you would never do. Either way, it’s fun and affordable, grab a friend and go try on different looks.

Nowadays wigs are more popular than ever and can fool many people. Having a really good wig can give you that fresh cut feeling without the commitment. Having a short wig can switch up your look instantly and serve as a protective style as well when not wanting to heat style or put wear and tear on your hair.

Virtual Reality and Phone apps

There are some really cool phone apps and computer software that photoshops short haircut looks of  you on to your selected photo or even with a live image. With this, you can get a 2d or 3d image of what you would look like with a different look.

What is great about the computer software or apps it can give you an idea about a different look from the comfort of your own home. You can see how you potentially look with different short shapes like pixies with short cropped bangs or a short cut with light hair.

We live in an era that we can all photoshop pictures by the use of phone apps to change your hairstyle the same as your eye color. We are very lucky to have these mediums available for us to use and get a feel for the looks. Filters on certain apps can change and add accessories to your selfie. This is definitely an area to explore especially if you are shy and don’t want to try on actual wigs. Go to the app store and do a search for an app.

Ask about referrals.

Have you ever seen someone and think I love their hair cut, it looks so great, and it is cut perfect. That is a great way to land a really great hairstylist. Simply state to the person, you admire their hair cut and or shape and mention that you are looking for a new hairdresser. Most will be happy they are getting compliments and gladly refer you to their hairstylist.

Finding the right hair stylist to cut your hair is very crucial. It can mean the difference of having a breakthrough into a new makeover or a huge regret.

When consulting with stylist bring a lot of pictures of the type of cut you would like and compare it to the ones that the stylist has done. You want to be able to communicate effectively. It’s also great for the stylist to recommend you a style or to highlight whether or not the look would suit you.

Stay clear of stylist’s that are too eager to cut it. Having short great looking hair is just as important as long great looking hair.

Trial and error.

Sometimes you just have to take the plunge.

How else will you know if the look will flatter you? There are times that society will determine that certain cuts won’t flatter us because of age or because we may have a different texture. I think the only way to really know is to do it.

There are many times people get surprised how much easier their styling became or how why they waited so long to try a change. The great thing is that it’s never permanent. Luckily hair grows back and hair will go through different stages in the process of growing out.

Just cut it short

Many times cutting short is the only option. Over processed hair breaks off on it its own, or chemical treatments that overlapped create damage that can lead to breakage. Sometimes, the only option is to that can make it look good is a short hair cut.  Nothing can fix damaged hair better than a fresh new cut. The more damage the shorter you must go to make it look like an intentional look.

A few years ago Jennifer Lawrence went short. She admitted her hair got fried from dyeing and decided to cut it short. It turned out to be so trendy girls were chopping their looks as well. She took a bad situation and made headlines when she reemerged with her striking new cut.

Rhianna is another champion and wears short hair with as a statement. Having the micro-short bangs with the wispy short pixie draws attention to her beautiful face and striking eyes.

Maintenance

Let’s say you just cut your hair and now you love it. It is likely you may want to maintain it short so you must be consistent with trimming/haircut appointments.

Depending on the haircut and speed of your natural hair growth hair must be cut every 4-8 weeks to keep the look intact. After 2 months hair starts to look longer and hair no longer cooperates with styling products as well. Hair can be too puffy or flat depending on the outgrowth. Having regular trims is the only downside of short hair. You must keep it shaped.

A good pixie cut when cut ultra-short can last for about 8- 10 weeks. The growing trouble will be the nape and hair near the ear. These will show signs of growth first and will need to get regularly trimmed more often.

Some women have opted to visit barbers to get shape ups and designs as well.

Made more for the edgy girl who wears short and ultra-cropped hair designs done with hair machine and clipper effects. They can get a fresh and clean look just by cleaning up the nape and sideburn area.

Even when growing it out you will need regular trims to keep it looking balanced.

Growing it out.

So what do you do when you cut your hair short and now decide want to grow your hair longer again?

This is a common request after someone has cut their hair, they are either ready to grow out or want a longer style.

Trimming it often the first couple of months is key. Short hair grows out into a mullet because of the way the hair grows from a cropped pixie. Keeping the nape hair close for a few months allows for top layers to grow into a neat bob.

It takes 9 months for a 3-inch pixie to reach a short cheek length to chin bob.

You must be patient to deal with the growing stages as well. being creative while growing out helps a lot as well as each stage transitions you into a different length.

Accessories also help out in the growing out stages. There’s no better time to get playful and add barrettes and scarfs to disguise bad hair days and hat hair. The best times to grow hair is in the fall and winter. Cutting hair too close to summer might make you feel like you made a mistake and also make you not want to grow it and just keep cutting it shorter. The best times to cut your hair are the fall and the spring allowing the following season to grow it out to a new look or maintain the new look you want to keep.

One last tip, with short hair you can make makeup techniques and jewelry really stand out. Play up the new cut with dangly earrings and dramatic lips or eye makeup to make your new hair cut stand out.  Nothing makes a woman feel girly with short hair than with accessories and makeup. In fact, it’s key. Whether you are carefree and easy and need a simple short look or either a chic businesswoman with a micro short cut, it can still be feminine.

The best example of short hair royalty goes to the beautiful Halle Berry whos micro pixie cut is still in demand at salons and serves as the picture for a great timeless short haircut wearing amazing gowns, makeup, and jewelry to compliment her short look. Even in 2019, she still epitomizes elegance and ultra femininity on the red carpet and will forever be timeless with her bold short haircut.

How to Take Care of Relaxed Hair and Make It Grow


[et_pb_section fb_built=”1″ _builder_version=”3.0.47″][et_pb_row _builder_version=”3.0.48″ background_size=”initial” background_position=”top_left” background_repeat=”repeat”][et_pb_column type=”4_4″ _builder_version=”3.0.47″][et_pb_text _builder_version=”3.21.3″ background_size=”initial” background_position=”top_left” background_repeat=”repeat”]

Over the years, society has associated hair with beauty, youthfulness, strength and even, masculinity. There are plenty of things that one can do with hair and one of the most popular is having relaxed hair. Knowing what products work effectively will help in growing out healthy relaxed hair.

There are different ways to take proper care of your relaxed hair and make it grow. Avoiding hair breakage or damage can definitely help increase hair length. There are hair care procedures and treatments that can be done at home or with a hair care expert. Learn how you can keep your relaxed hair healthy and growing through the following tips.

Understanding Relaxed Hair

Relaxed hair is a popular treatment, especially among women. It is important to understand what the treatment is to help you care and grow your hair. The process involves using a special type of lotion or cream that is called a relaxer.

Relaxers contain chemicals that break down hair component to change its texture. It is commonly used by people with curls to “relax” the hair, resulting to straighter hair. The process can be drying, and the hair needs to be cared for and nourished properly.

Caring for Relaxed Hair

Wash your hair with care

One of the easiest things that you can do at home is to wash and condition your hair. This is to help remove excess oil and build up from your scalp and hair. In addition, the build-up can prevent hair from growing.

Wash your hair at least every 2 weeks or once a week using a moisturizing shampoo. Choose shampoos that are gentle and sulfate-free.

There are products available on the market that are made for relaxed or treated hair. It helps to check product labels so that you can pick the best products for you.

If possible, avoid using shampoo and products with drying ingredients such as alcohol. It is also important to remember that too much shampooing can be drying.

Wash gently and give your scalp a good massage to promote hair growth. When towel drying, avoid rubbing vigorously as this can cause hair breakage. You can also try air drying instead.

If you would like to try skipping the shampoo, you can opt for co-washing or conditioner-only washing. Cleansing conditioners keep the hair and scalp moisturized. These differ from regular conditioners in product formulation and typically contain natural ingredients such as aloe vera, cocoa butter, olive oil, and avocado.

However, people with fine or thin hair may not benefit from co-washing, because the product may weigh the hair down.

Also, remember to avoid over washing. Too much washing can lead to drying. Some hair care experts also add that relaxed hair is weaker when it is wet.

Moisturize but don’t overdo it

The process of relaxing strips the hair of its natural oils. Without proper moisture, hair can get easily damaged, and relaxed hair is usually fragile. There are different methods that you can do at home to moisturize your locks.

First is by is using a conditioner. Use good quality conditioner after every shampoo to lock in moisture. You can opt to look for products that are made for chemically treated hair. Another is to do deep condition at least once a week to re-hydrate your locks. Twice a week is ideal if you observe more hair breakage. You may also choose a protein-based deep conditioner. Deep conditioning protects the hair from further damage. There are many products available on the market for this purpose.

For more natural options, you may deep condition with coconut oil, argan oil or mashed avocado.

Next tip is to use a moisturizer or a leave-in. This also helps restore moisture in your hair, leaving it soft and shiny.

Generally, hair moisturizing products can either be oil-based or water-based. These differ in application. Avoid using products with heavy ingredients such as petroleum and mineral oil.

Replenish protein in your hair

Protein is the basic component of the hair. Special protein treatments replenish the protein in the hair and boost the hair strength. These differ from conditioners that are protein-infused.

Different protein treatment products are available and can vary in ingredients, such as shea butter, yogurt, manuka honey, and essential oils. You can find the product that is best for your hair. Always follow label instructions.

You may also try homemade protein treatments. These can target and nourish the outside of the hair. How often you need to do protein treatment depends on your hair condition, it can be done once every four or six weeks.


Trim split ends

Trimming may be counter-intuitive especially if you’re growing your relaxed hair.

How does trimming help? Relaxed hair can be prone to split ends. It is important to remove damaged ends, as these negate hair growth.

Split ends can travel up to the hair shaft and can lead to further hair damage. Trimming keeps hair healthy as it grows.

You should trim half an inch every six to eight weeks. During the cooler seasons, split ends may happen frequently so adjust your schedule as needed to keep your hair in optimum shape.

Secure your strands with protective styles

Examples of protective styles are buns, braids, French twists, updos. Doing these minimize breakage by immobilizing the hair, therefore protecting the hair strands. and keeps them from getting frizzy. Protective hairstyling does not directly make hair grow faster, instead, it helps maintain hair length.

While it may be tempting to leave your hair in protective style, don’t keep it for too long. Avoid doing this frequently. Allow your scalp and hair to breathe in between protective styles.

Wearing a satin wrap or bonnet can also protect your hair during sleep.

Low or no heat styling is better

Use as little heat as possible when styling your hair. Excessive heat can alter the protein composition of your hair, making it weak. Styling with heat can make the hair very dry and prone to split ends or damage.

You may want to consider using heat protectants. There are leave-in conditioners that contain thermal protectants.

Alternatively, there are ways to style your hair that do not require heat such as giving it more body by teasing from the roots with a comb. Oils and creams can be used to make it more manageable. You may also use foam rollers, satin rollers, rod sets, and hair extensions to style your hair instead of using heat.


Handle your hair with care

Relaxed hair can be fragile or brittle, so harsh products and excessive brushing can only lead to more breakage and hair fall. If you really need to use strong chemical-based hair products, it is better to have this done by a hair professional or licensed cosmetologist.

Untangle your hair gentle using seamless combs. These will not catch on your hair and cause breakage unlike harsh bristles.

Also, look out for extreme sun exposure. You can use scarfs, umbrellas and hats to protect your head from the harmful rays of the sun. When swimming, use caps. Pool water usually contains chlorine that can affect your hair.


Avoid over-processing

Over-processing or overlapping happens when there is excessive usage of hair chemical treatments. This will make your hair extremely vulnerable to breakage. The texture of your hair will become very different and thin.

For instance, applying relaxer on newly relaxed hair is one way to commit overlapping. Hair dyeing after relaxing is another way of over-processing.

Take a breather. Depending on how healthy your scalp and hair is, rest for a minimum of two to four weeks. Consult a hair expert before starting a new treatment.


Be mindful of your diet

Drink plenty of water, it’s a source of hydration for your scalp and hair. Include healthy protein-rich food in the diet to help your body produce keratin, which is vital to hair structure. Exercise regularly.

If it’s challenging to maintain a healthy diet, supplements such as vitamin B complex and folic acid are great for healthy hair too.Hair vitamins are also available to promote healthy hair growth.

Seek Hair Care Professional Advice

Every hair is different. A hair care expert or a licensed cosmetologist can help you assess and evaluate your hair.

When in doubt, experts can help you figure out what your hair needs. They can recommend the best products and maintenance suited for you.

Experts stress this again and again, never relax hair that has been recently relaxed. They advise that you leave hair chemical treatments in the hands of licensed professionals. Do-it-yourself methods can be risky.

Relaxed hair also needs retouching. While you may do this at home, be sure to follow instructions given by your stylist to avoid over-processing and major damage.

How often should you touch up your hair? Experts recommended eight to sixteen weeks spacing between touch up sessions. Follow this carefully to avoid suffering from permanent hair loss due to damage.

Invest in a trusted hair professional who can help you touch up, re-color, trim, and maintain your healthy and growing relaxed hair.


[/et_pb_text][/et_pb_column][/et_pb_row][/et_pb_section]