Recent Posts

Perms vs. Relaxers – What is the difference?


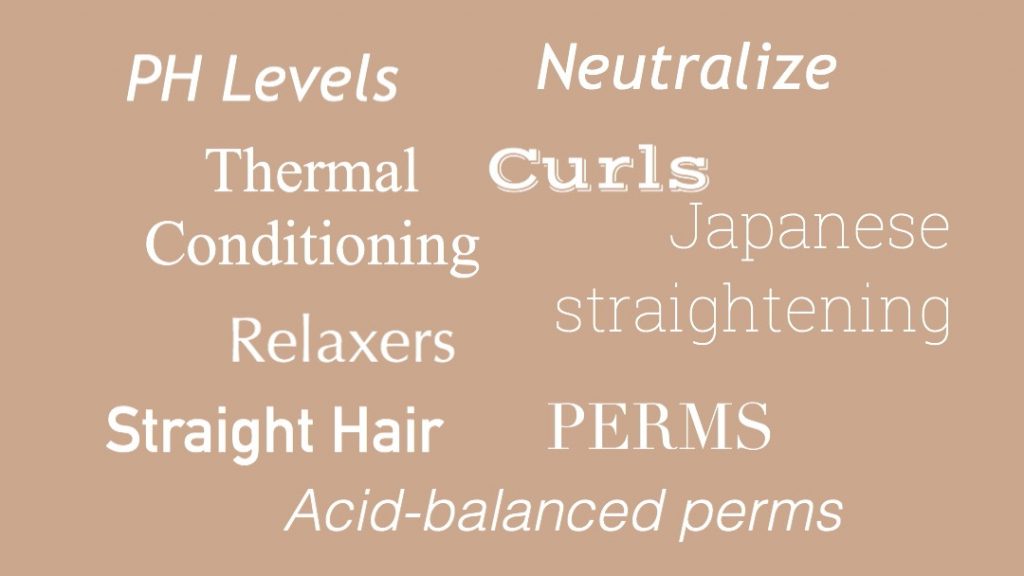
Perms are applied to naturally straight hair and the aim is to introduce curls to the hair. The process is achieved by the use of chemicals along with rods and rollers. When the chemical is applied to the hair, the hair takes the shape of the rod and then they are neutralized. Perms make use of ammonium thioglycolate which is also called Theo or thiol. Some perms are meant to be gentle on hair and they use glyceryl monothioglycolate. These are called acid balanced perms.

Relaxer is the permanent hair straightening method. The hair relaxer will stretch the natural curl pattern or tightly curled hair depending on the strength and the timing of the chemical. The relaxer is a creamy paste that gets applied directly on to the hair avoiding the scalp. once you see the results you like, you thoroughly wash out the relaxer and you will apply the neutralizing shampoo. The hair will remain straight until new hair grows out. Relaxers, make use of sodium hydroxide. However, there are some relaxers that might make use of ammonium thioglycolate like perms and just omit rods and rollers that are otherwise used to curl the hair.

The latest technological advancements in the hair industry have taken us all by storm. We already know that different people possess different hair characteristics. You find people with curly hair, straight hair, thin hair, thick hair, and the list continues. The way you describe the look to your salon professional will help to guide them in understanding the type of service you are looking for.


People now have multiple options to transform their natural hair to get the look they want to be performed by working with a licensed cosmetologist.

The hair straightening can also be known as Japanese straightening or thermal reconditioning as well. The product would be strategically placed and process with a heat lamp as per the manufacturer’s directions. As different than a relaxer, the thermal reconditioning will require drying and smoothing the hair with heat irons to seal product before the neutralizer is applied.

Perms and relaxers are two such impressive techniques that help people to achieve the desired look. However, little do people know about these techniques, often find themselves in a fix as to which is the right technique and style for them. For many of them, perms and relaxers are one and the same thing. But they are not the same. They are applied to one’s hair for different purposes and the results that follow are different as well.

Another difference between a relaxer and the perm lies in the procedure applied and the intended outcome. While a perm is used to introduce curls to the hair with the help of plastic curling rods, a relaxer is used to loosen and relax natural curls and waves from the hair. Nevertheless, the chemicals used in both methods are similar in that they work to change the current structure of the hair.

Hair relaxers and perms are trending these days and many salons are providing these services to their clients. Both of these techniques are effective and thus, people are embracing these hair techniques as well. Before you choose any of the treatments for your hair, here are some of the facts that you must know about them.
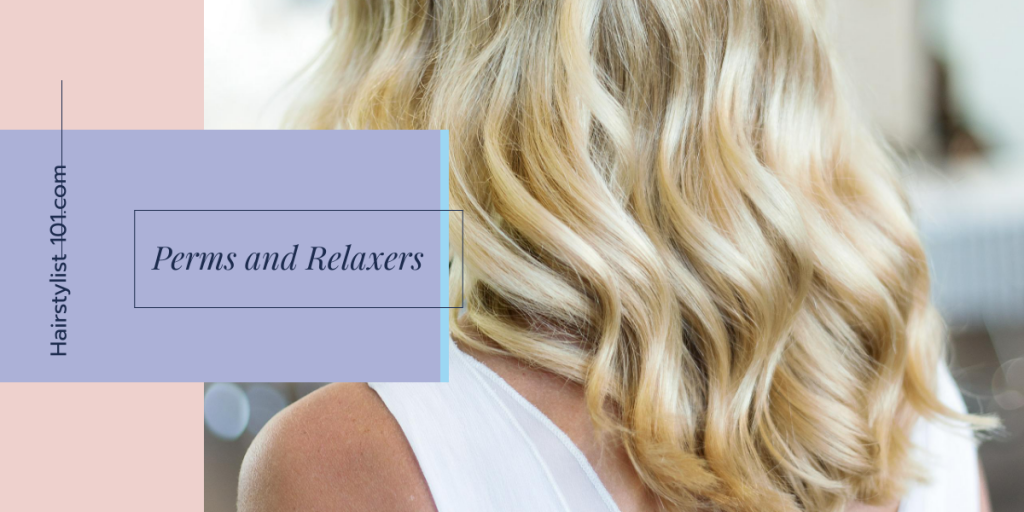
What you must know about perms and relaxers?

Both techniques make use of chemicals to alter hair. The results differ due to the PH levels of the chemicals used in both the techniques. The re-shaping is largely dependent on the pH level of the chemical used.

Hair Perms

It is very much possible to customize the shape of the hair as per the need of the customer. Depending on length and style a permanent wave can last between 3 months to 6 months. Short hairstyles can last 3 months while longer hair will have longer results. With either one of these shapes, the roots eventually get flat and that’s when a new perm would be needed.

There are many different sizes of rods and rollers to wrap for different curl pattern results. There can be straw sized rods for tight coil curls to silver dollars size rods for a body bounce. There are many sizes in between to fit the look and overall style. Rods and rollers come in a variety of different colors to keep the pattern consistent. Using different rod sizes can make tighter or looser curls where ever you may need them

Hair is sectioned in wide but thin sections wrapping wet hair winding from tips to roots. Endpapers will aid you in getting clean sections on to the rod. This ensures uneven hair cuts can be wound evenly in order for the ends of the hair to have a smooth finish.

Relaxers

As your natural hair grows out and your hair is in need of a touch up.. that is exactly what you will do, touch up the new growth area. People mistakenly think you have to run the relaxer throughout the entire hair shaft. Doing this can lead to breakage and damaged hair. once relaxer is overlapped, it cannot be repaired. With relaxers the longer and heavier the hair is, will prolong the effects of the treatment. Shorter hair or maintained haircuts will eventually have the treated hair cut off resulting in the springing of the curls on the roots.

Having severely damaged or pre-lightened hair can result in severe damage to the hair. The chemicals alter natural and virgin hair evenly, but if the hair is damaged where the porosity of the hair is mismatched the results will be traumatic for the over processed hair. Highlighted or over processed bleached hair can result in breakage and damage can occur as well. Milder options chemicals can be researched as well for special hair. Having highlights or high lift colors on perms or relaxers are not recommended for optimum results.
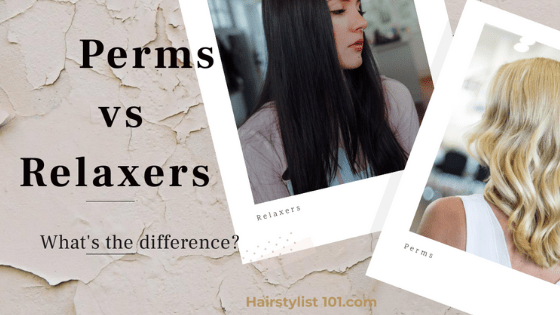
Detailed differences between perms and relaxers

We have already seen that a perm and a relaxer is applied to the hair for different intended outcomes, and how the chemicals affect the texture. However, ph. levels used in the chemicals differ in both the methods.

When we talk about the mechanical manipulation of the hair, both of these techniques sound similar because both of the technique involves lifting of the outermost layer of the hair strand and break the disulfide bond that helps to alter the natural texture of the hair. This is the point that will decide the future shape of the hair. The hair specialist or the cosmetologist will know how to hold the hair at this stage to achieve the desired outcome.

In perm, the stylist will wrap the hair around the rods and rollers while in the relaxer, the stylist will either straighten the hair with his or her fingers or apply a brush to achieve straight hair for the client.

After the perm has timed and after a good rinse, the cosmetologist must apply a neutralizing solution to the hair. The neutralizer will re-harden and shrink the hair and will restore the ph balance in the hair from alkaline to an acid state. This neutralizing solution helps the hair to reform and take a new shape, while rods are still on.

In the case of relaxers, a neutralizing shampoo is used to maintain ph level in the hair.

This neutralizing shampoo does not help in reforming the hair. The strength will also depend upon how the chemicals have been applied to the hair and how much is the amount of PH levels.

One more difference between relaxer and perm is the chemical makeup. The chemicals used in both techniques are different.

Both the techniques vary application-wise as well. Perms are usually liquid in nature while relaxers use a paste to be applied on the hair. The solution that is used during perming is directly applied from the bottle to the hair while in the relaxer, the cosmetologist will mix the solutions, create a paste and then apply it to the hair. The cosmetologist will do so with the help of a brush.

When we talk about the difference in the PH levels, relaxers are more alkaline in nature. A regular relaxer will have Ph. levels between 12 and 14 while the PH level of a regular perm is between 9.0 – 9.6. further, the acid categories of perms and relaxers will also differ and there is a huge difference between the PH levels of both the techniques. PH levels in the technique used pose great importance because of the more the ph. level used, the more it is harmful to the hair. The cosmetologist must be very efficient to complete the process within the shortest period of time so that the hair damage is minimum. Second, the more the ph. levels, the more are the chances of scalp irritation or scalp burning. Lastly, if the hair is too thick, the chemicals should have more PH levels because low ph. levels will provide you with loose results.

Whatever technique you choose, ensure that the quality of your hair is good to bear them. People with fragile and thin hair are not advised to go for such treatments. Consult an expert cosmetologist to know further about it.
10 Tips on Being a Successful Traveling Wedding Hairstylist


In my many years as a hairstylist including providing wedding services in  different locations which often involves traveling, I always abide with these 10 practical tips to be successful:

1.   Have a contract.

One of the most important parts of being a successful traveling stylist is to settle the business aspect. This is where you will present the contract. Included in the contract will be the price of the service, the deposit amount to secure, the date and services to be rendered. It will also include information gathered at the trial with the bride and/or client and bridal party including any guest/s being serviced as well. This contract will make you look professional and make you work better knowing that the transaction is settled.

Many times I have gotten paid up front for the job and it makes the rest of the creative flow during the day so much better knowing you don’t have to figure out what to charge if you didn’t settle early on with prices. Furthermore, knowing you can deliver what you promised is great as well and speaks volumes of who you are as a professional especially when they refer you. Remember that a referral is the best form of advertisement.

2.   Be on time.

When you are hired to do a traveling service, you both need to agree on the time. It is mandatory that you be there exactly when they need you. In fact, I personally always ask if I can set up 30 minutes before. It ensures that I’m there at the time needed and also prepare for traffic and rushing around that can occur when traveling because that can happen if YOU are late. Even if you are there too early it’s great as well to remember that you are providing a luxury service. You will need time for unpacking your materials and setting them up which can take time as well.

Having all your tools and materials all clean and ready to work exactly when you promised just sets the stage for a great flow. in the case they are late but they hired you for the day rate, you must deliver no matter the circumstance but if you have explained you have another commitment to attend after and they are running too late, they will understand because you delivered your end of the deal. So, always be on time. It saves your energy, keeps your creativity and focus throughout.

3.   Have all the tools you need.

When setting up a pop-up traveling hair service you want to make sure you have all the heat tools, blowdryer, brushes, and combs you need to execute the hairstyles that are to be done. Paddle brushes for detangling quickly and boar bristle brushes for a shiny and smooth style. You will also need teasing combs and brushes to detail styles as well.

I suggest having a thin plate flatiron and several different-sized wands or curling irons to create different curl or wave effects. I also bring mini crimping irons for texture on fine hair and 2 prong iron to make s waves if they choose a different wave pattern. Bringing a variety of tools can make different styles and you can prepare for any challenge.

4. Pack all the products you need.

Providing you have all the tools you need, you also must have all the hair products you will need. Having the right products will help in shaping with heat tools and set any looks needed for the service. Flexible hold hair spray is a great product to have to either spray on before you heat style or after the style is created. What’s great about flexible hold spray is that it can be brushed out or used sparingly if the client wants a soft spray after a blowout.

Also, you will need a strong hold hair spray to freeze certain shapes and to lock in shape in updos or hair creations where needed.

Also to the products kit, I bring gloss drops for shine, dry powder to create volume, mousse for styling and matte clay or pliable paste for separation and where more moist products can be used.

5. Bring bobby pins of all colors, sizes, and types.

Bobby pins in all colors and sizes are very crucial in the art of updo and formal styling. They are what holds heavy and long hair in place depending on the style. The average updo uses at least 30 bobby pins in different sizes and different shapes. Bobby pins are 2-3 inch in size with a flat side and a grooved side. When placing pins the grooved side faces onto the scalp, the curve conforms to the head and hair stays in place. larger versions of bobby pins come in 3-4-inch pins with flat sides. They hold hair tightly in place and replace 2-3 normal bobby pins as far as the hold is needed.

French pins are open pins that resemble paper clips. They can be bent to hook, and they are smaller and more discreet. They also come in larger sizes to use in more volume styles or to secure strands by gliding through the tease and hold them still. The typical colors are black, bronze, blond and silver. However, bobby pins can come in a variety of colors and some can have jewels or glitter making them for more prominent use or detail hair designs with flare.

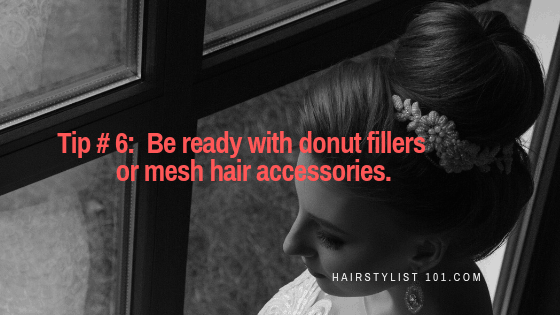
6.  Be ready with donut fillers or mesh hair accessories.

Donut bun mesh or hair fillers are a soft plastic mesh material molded like donuts or like sausage links. They are used to mold natural hair over and create balanced volume and create volume in areas where you want the hair to appear fuller and to be able to pin through. Using these donut buns can make skimpy hair look fuller and the good thing is you would not have to over tease the hair to make volume on fine or fragile hair.

If a mesh material is too large or a smaller piece is needed, they can be easily cut and shaped the way you want to use them on the hair. They come in beige, brown and black colors. They cut your time in half and really make amazing updos when used in hairstyles.

7. Don’t forget rubber bands or bungee cord fasteners.

Rubber bands, hair grips, and bungee hair elastic cords are other materials needed to execute different looks. When securing braided tails, and ponytails the grips will hold the hairstyle in place. Bungee cords are strong elastic cords that have hooks on both sides and can secure many different densities in hair. As opposed to normal round cords, using bungee cords makes ponytails look neat and keep the height and balance still while rotating the cord. Simply hook one end to the hair closest to the scalp and wind till desired tightness is needed and hook through hair. The elastic will stay put and keep all hair neatly in place.

8. Prepare those Hair Extensions.

When preparing for a big event or a wedding having a proper protocol on how to deal with hair extensions and preparing them is key. In many cases I always have the hair extensions in my possession before the event to set the hair and prepare for the look we are creating.

Having the hair prepared reduces styling time and make the hair longer lasting for certain styles. I will wash, dry, curl, and set the hair extensions a few days before, resulting in a great hold that will last all night/day. Extensions are the best accessory to make styling capabilities come to life. Hair can be made to look longer, fuller, and blend to alter your look instantly.

9. Bring a packed lunch /protein bar.

There’s nothing worse than trying to be creative and efficient when you are starving.  You get cranky and all you can focus on is when you’re going to eat which can stress you out. It is your responsibility to pack a lunch or to have protein bars or shakes, to satisfy your hunger on jobs at sites. Mostly all weddings and special events have food they provide for guest and staff, but it is not mandatory.

You cannot bank on clients to feed you. It is a courtesy and it’s very generous if they provide that to you.  I will always pack a light sandwich or fruit to keep me full while working. If you are on time you can always take a break for a few minutes to eat but it’s best advised to provide that for yourself.

10. Please, no drinking on the job!  (At All!)

Along with food provided at weddings and events, champagne and liquor are commonly brought as well to celebrate and to relax and get pampered for the guest. Although they are gracious enough to feed you food and drinks, I would advise absolutely no drinking liquor on the job. I insist that you don’t drink on the job and they will respect you. Knowing they are in good professional hands.

You are hired as a professional who is going to execute and perform to the best of your abilities. The pampering and celebrating are for the guest and I love to see everyone toast and cheer while getting prepared. Drinking on the job can alter your expertise and make you clumsy while working on a client.

Also, you’re working with hot tools and don’t want to burn anyone using a curling iron. My reputation and professionalism are at stake and I want my clients to refer me as a 5-star service.

Apply these 10 steps to help you be a successful traveling hairstylist and make for a lucrative business.

Good luck and wishing you all the best,

Ray Negron

Professional Hairstylist

P.S. Don’t forget to have fun on the job!

13 Cute and Easy Spring Hairstyles for a Fresh Look


[et_pb_section fb_built=”1″ _builder_version=”3.0.47″][et_pb_row _builder_version=”3.0.48″ background_size=”initial” background_position=”top_left” background_repeat=”repeat”][et_pb_column type=”4_4″ _builder_version=”3.0.47″][et_pb_text _builder_version=”3.0.74″ background_size=”initial” background_position=”top_left” background_repeat=”repeat”]

Spring has always been one of my favorite seasons. I always look forward to seeing fresh blooms and beautiful flowers everywhere. Even more, I feel that spring is the best time to try new hairstyles for a fresh look.

Gone are the cold winter days when the only option is wearing hats to keep warm and resorting to flat static hair. In fact, the nicer weather just makes me immediately want to hop on the latest hair trends.

No matter the length of your hair, you can always style it better with just a few twists. Spice up your look with new hair color, a fresh cut or simply use trendy clips and ponytails.

For your best look just yet, try one from these 13 cute and easy spring hairstyles.


       Barette Overload

You heard it right, our favorite barrette clips are making a comeback! You’ve probably had them when you were a kid, and deep inside you’re dying to wear them again, right?

This is one of the best hairstyles to pull off this spring and admittedly the easiest. You don’t need to do anything, no chops, and no colors. Such an easy add-on to instantly add pizzaz to your style.

Barette Overload Styling tips:

Part your hair, add clips on one or both sides. Choose barrettes with gems, pearls, or jewels. Oversized clips are also great for styling.

High Ponytail

Whether you have straight or curly hair, a high ponytail is a quick and reliable option for girls. The simplest version of this hairstyle – aka the plain ponytail – is so easy it can be perfected in under 2 minutes.

What’s great about this hairstyle is that you can still style it any way you want. You can have it super sleek and straight, or make it wavy at the ends. You can also add a few twists like braiding the hair after the base knot. You can also fishtail braid it or 2 strand twist it to switch up the look

High Ponytail Styling tips:

Spring is the season for accessories. Use hair scarf scrunchies instead of the usual elastic bands for a cute, girly look. Use hairspray to get rid of flyaways and gloss drops to add shine to your tresses.


Wispy Bangs

Don’t be afraid to get those bangs just because you can’t commit to keeping them tidy. Spring is the best season to let your hair flow freely.

Wispy bangs are super chic and look great with buns and loose hair. With just a few chops, you can pull off a totally different look. The bangs are long and textured, which work great for middle and side-parted looks. They can also be styled away from the face to blend into the hair which makes them versatile.

Wispy Bangs Styling tips:

Avoid using heavy products to style your bangs. Whip dry the hair 60 percent and blow dry bangs under and over to give it movement and let it flow naturally. You can part your bangs in the center like a curtain, or you can pull it to the side. The key is to start with fresh clean hair. That way when you blow dry the hair it can have the most body. If any finishing products are needed you can sparingly use until the desired look is achieved.

Messy Hair Bun 

For girls who have medium to long hair, putting them on a messy bun is one sure way to look great. People like this hairstyle because it looks cool, elegant and effortless.

The bun can be a top knot or low, depending on your preference. What makes this hairstyle great is that you can wear it for a simple everyday look or even at formal events.

Messy Hair Bun Styling tips:

Use your fingers to comb the hair and put in a ponytail. Make the bun loose or use donut forms if you want a perfect looking donut bun. To complete the look, leave loose strands out to frame the face and accent your features.

Romantic Waves

When people think of romantic looks, we picture soft, waves and big curls. Since spring is undeniably a romantic season, a loose curl is one of the best hairstyles you can wear casual and formal as well.

This hairstyle highlights your natural beauty. The waves also look very feminine. Definitely flattering on all face shapes as the curls are not tight.

Romantic Waves Styling tips:

Using a wand or curling iron stay away from curling the roots and tips that way they don’t look too uniform and look more natural and soft. Curl the hair in different directions as well to avoid that set perfect curl look. Soft curls can be achieved even if you have short hair. Use sea salt spray on damp hair to create more volume and skip sections when curling to emphasize soft wave shape. Here’s a tip wait till all hair is curled and cooled down before combing out or brushing. This will help to keep the shape and hold.


Beautiful Braids

Braided hairstyles are my favorite. Whether it’s a regular french braid, a dutch braid or a fishtail braid, girls who wear it always end up looking pretty.
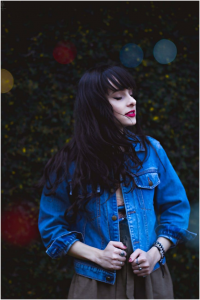
For spring hairstyles, your best option is to combine a rope braid for the upper to the middle part, and a fishtail braid for the ends. Other girls prefer putting on a rose braid in time for spring.

Beautiful Braids Styling tips:

Make sure that your hair is tangle-free before you start braiding. Note that braiding your own hair is not as easy as it looks like for beginners. Allocate enough time for practice. If the hair is too thin using clip-on hair extensions can augment your braid and make it look longer and fuller.


Long Wavy Hair with Fringe

If you have long straight hair looking for a simple upgrade, try curling your ends and adding a full fringe. Loose, wavy curls are perfect for spring and the fringe is a cute and edgy addition to this look.

This hairstyle is very flattering for all hair colors. It is very simple and can be done in just a few minutes, making it a favorite go-to hairstyle for many ladies.

Long Wavy Hair Styling tips:

To get this gorgeous hair, blow dry hair and immediately wrap 2-4  sections and create buns and secure with claw clips. Let cool for 20 minutes and then undo the buns and fingerstyle. The hair will be bouncy and wavy without using a heat tool. The more sections the more curl and bounce you will have.


Blunt Bob

What better way to sport a fresh new look than chopping your hair short, right? Get a complete makeover with this hairdo and you will surely get a younger and fresh looking face.

Many celebrities were seen sporting this hairstyle and for the right reasons. Trimming your hair is important to get rid of dead ends, making it healthier.

Blunt Bob Styling Tips:

A short blunt bob cut can be worn super straight or voluminous and messy. For a more dramatic transformation, you can also style your new bob with full straight bangs.


Short Vintage Curls

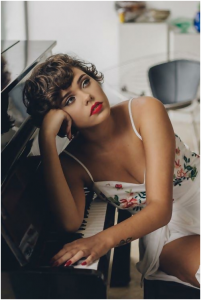
Another one on the list of best spring hairstyles is this classic vintage-inspired look. I love how the curls are very defined, full of volume, and soft-looking too.

Girls with natural curls are very lucky as they can pull off this look without the hassle. On the other side, straight haired girls with chin-length cuts need at least 20 minutes to achieve this hairdo.

Short Vintage Curls Styling tips:

Instead of using curling irons or hot rollers, the best way to achieve this hairdo is by using a vintage wet set. Basically, you have to start with wet hair, put on the rollers and you can either dry them under a hooded dryer or wait overnight to air dry.

Pixie Hair

If you’ve been wanting a total hair transformation, go for the pixie hairstyle. You can totally make it cool and feminine at the same time. Be brave! It’s all about the details.

Notice how you can soften your look by changing the color of your hair. If you want to make it very edgy, try adding micro bangs. The best thing about pixie hairstyles is that you don’t have to worry about hair tangles this windy spring anymore!

Pixie Hair Styling tips:

This hairstyle perfectly goes with big bold earrings like large hoops and jeweled dangles. Choose bold lip colors, use colorful eye shadow, or highlight your cheekbones.


Lilac Hair

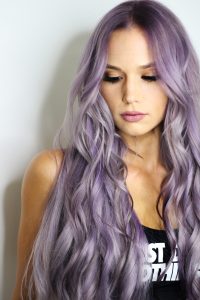
Coloring your hair lilac is one of the best hairstyle trends this spring. It blends well with the color of the season and definitely an easy way to stand-out.

To get the right shade of purple on your hair, make sure to plan it well with your hairstylist. The process to achieve the right highlights may take more than one session. This color works best on blonde or pre-lightened hair.

Lilac Hair Styling tips:

If you’re worried about the long-term effects of hair lightening and dyeing your whole head, you can start with purple highlights. Another option would be temporary hair dyes or hair shampoo.

Balayage Style

Balayage is a technique of hand-painting color into the hair. The result is sure to be stunning, as the highlights will look soft and natural.

What I love about balayage is that it can work on any hair color and shade. It is also low maintenance, making it one of the best spring hairstyles today.


Balayage Styling tips:

Lightening your hair is part of the process, so you always have to use conditioner to care for your hair. Use a moisturizing hair mask at least once a week to reduce dryness. Hot oil treatments are also important. When styling for your everyday look, apply hair polish or hair balm.

Natural Look

Last on the list, but definitely one of the best spring hairstyles is your natural hair. If you’ve styled it for too long, going back to your roots is your best for a fresh start.

Without the use of harsh chemicals or heating devices, your hair will naturally become healthier. You’ll be surprised as to how liberating it is to wear your natural hair.

You can be as carefree as you want to be. Just relax and let your own crowning glory do its wonders.

Natural Look Styling tips:

To care for your hair, you have to select the right products to use. There are tons of hair care products available so it can get confusing. The key is to understand your hair type, research about the ingredients, and take note of what works well and what does not.


[/et_pb_text][/et_pb_column][/et_pb_row][/et_pb_section]

Step by Step Guide to Cutting Long Shaggy Layers


When cutting hair, it is important to assess the hair and decide what pattern you will use to create their desired look. Following a pattern will make sure you follow the appropriate steps so that you get the right look every time. For instance, this is my pattern for cutting a long-layered haircut.

I begin by first sectioning the hair and establishing a length. I then move to the front of the hair and decide if we’ll use a middle part, a side part, or bangs. At this point, if we have decided to cut out bangs, I do. If we have agreed on a middle or a side part, I will take a tiny section from both partings and cut out a guideline. I usually use points on the face for reference—the bridge of the nose, the tip of the nose, the lips, the chin, or below the chin, depending on what the starting layer will be.

At this point, once I’ve decided on the starting layer, I face-frame from the starting guideline and cut using the slither technique down to the length. For example, if the client wants short, shaggy layers with no bangs, I would cut the starting point at the bridge of the nose, then face-frame evenly on both sides. The same pattern applies if cutting on a side part; just keep in mind if you position it back in the middle, it will be uneven. Side part cuts should only be used on someone who always wears their hair to the side.

Now that I’ve done the length and the face-frame, I grab a one-inch Mohawk section from the front of the hairline to the crown right before it rounds to the back of the head. This one-inch section will be the shortest layer and will serve as the guideline for blending into the length. After I have cut my guideline, I divide it in half and begin to work on one side of the head. Taking one-inch pie sections, I carefully cut down to the length. If I’m working on the left side of the head first, I make a cut, then go to the same spot on the right side and do the same cut. This ensures balance and keeps the layering consistent. I then work beside that section, cut, and repeat it on the other side of the head. I continue this process until I reach the middle of the back part of the head.

Using this pattern for a shaggy haircut has never failed me. Whether doing a short shag or a long one, this technique ensures even and consistent results.

Hairstylist 101 Terminology

Slithering

To slither is to use the shear like a razor. Keep shear in a half-open position place on the guideline and lightly cut and allow the shear to slither and glide down the shaft to the desired shape.

Chipping

When chipping into the hair with shears or thinning shears you cut into the hair parallel and remove bulk and leaving ends with less weight.

Thinning

To reduce bulk, balance out heavy hair. texturize hair to give it a more of a manageable texture create a more flattering density.

Density

How thick or thin the hair is . to describe the amount of hair in the head

Blunt

The weight of the cut or the shape lies on a blunt line

Feathered

The ends of the hair have uneven lines like ends of a feather

Pattern cutting

To follow to get precise results on specific haircuts

Custom cutting

Using unconventional and creative methods to cut hair

Razor cutting

To make deconstructed funky lines in a haircut. Used to soften hard lines an to remove bulk in thick textures. They are extremely sharp and how you use tension will vary the effects.

Custom cutting is the art of making a haircut work on different people. Not everyone has the same shape of the head, nor does the same density of hair flatter every client. Custom cutting individualizes a hairstyle for someone. There are times in the art of hairdressing that you must modify, or even create, movement or disappearance in the shaping of hair.

Some of the greatest custom cutting shapes include mohawks, textured lobs, undercut wedges, bangs, and side-swept bangs/layers. People who are gifted with an exuberant amount of hair are also excellent opportunities for a custom cut.

I have a client I’ve been styling for five years who has an amazing head of course, thick hair. My favorite texture to shape and style. When I first started doing her hair, she stressed that she loved the length of her hair and wouldn’t mind layering it, but she needed its thickness considerably reduced. I decided we would cut about three inches from her overall waist-length hair and reduce the bulk of hair with a thinning/texturizing shear. I decreased her hair density by about 35%, especially in the areas where heaviness remains, such as the back crown, occipital area, and nape area.

Another example of a custom cut is the gentleman whose hair I’ve cut for the past eight years. He has an undercut and likes to get his center, longer hair texturized from the mid-shaft down, giving the ends a wispier texture.

As a hair artist, I prefer doing custom cutting because it allows me to give someone a more personalized look. By the end of your consultation with the client, you should know whether you’ll use a pattern cut or a customized cut, considering what the client expects and what you can deliver.

To achieve funky cut lines in a haircut or a deconstructed shape like those used in custom cutting, having different tools and knowing how and when to use them is key.

Using a razor alone for a haircut can be tricky; razors are sharp and the tension used on the hair will change the effect of the cut. A heavy tension will create a bulky, feathered tip, while a light tension stroke can create a more controlled, flowy, feathered look. Razors are excellent for side-swept bangs, softening a blunt line, and thinning out very thick hair. They are best used, in my opinion, after a scissor cut to detail any hard lines. I love to use a razor after the blow-dry to soften the edges of a haircut. I rake the hair between my fingers and graze the razor along my palm, skimming the last two inches of hair or less. This gives softer ends within a more structured cut.

There are also electric hot razors. These razors vibrate and heat up the blade. When cutting with it, the heat seals the cuticle and minimizes frizz on curly hair. It works particularly well with hair extensions and thick, one-length hair, giving soft, textured ends. Both handle razors and electric razors use the same replacement blades. Haircutting blades come in a pack and make needing a fresh one simple. You pull out a new blade, replace the old one, and continue cutting. You can even get temporary razors. These are razors built into a disposable handle so you can throw them away after they have become dull

Razors are great for custom cutting; using different tensions and strokes can create personalized looks. While I think it’s best to tread slowly, take advantage of willing clients and friends who would let you experiment. This is where creativity will take the lead and you’ll be having fun at work in no time.

How To Choose Clip-in Hair Extensions Like A Pro  


Clip in hair extensions has become a girl’s best accessory, whether it’s adding a pop of color or dramatic change of length. Clip in hair extensions adds the quickest and safest way to augment hair for temporary use.  One of the questions I get asked is how and where can I get them.

Human hair vs. Synthetic hair

Human hair extensions are the top choice by professionals. Human hair allows you to heat style and color just like your own. If taken care of well they can last for a very long time. Minimal wear and tear will prolong use of them. Synthetic hair is much more affordable but very limited in their styling capabilities. Even though it might say heat friendly it won’t perform as optimum as human hair. Synthetic hair cannot be colored and has an unnatural, shiny look.

Color and Texture

When choosing the right color for extensions you want to stay within 2 shades of your color to look the most natural. Natural hair has slightly lighter ends. if more darkening needs to be done you can have a colorist add lowlights for darker tones or darken them to match to blend them even more. unless you are a platinum blonde or have black hair, you should always get them a shade lighter to get the best possible match. The texture of the extensions is just as important. If your natural hair has a curl, having extensions with a similar curl will look the most natural.  If your hair is thick and coarse, having a shiny soft texture will look mismatched. it will look artificial and can look like doll hair. your extensions should compliment your hair to achieve length or fullness.  

…stay within 2 shades of your color to look the most natural.

Length and Price

Depending on the style you are trying to achieve having the right length will make a huge difference.  Waved or curled styles will look shorter when curled so having a few extra inches will fall just right. Placing hair extensions below the crown can make the hair length look the longest.

Hair extensions can be anywhere from 8 inches long to 30 inches long and even ankle length hair like  Crystal Gayle regardless of length. lighter hair extensions and special color hair sets cost more in the market as compared to darker hair sets. Prices can start at about from about $75 and up for shorter lengths and be as high as $300 and up for waist length hair.

While there are many companies that carry luxurious thick sets of hair, it may not be uncommon that more hair may be needed. sometimes the density on commercial hair is very skimpy and more hair will need to get purchased to get the right look.  In big cities and metropolitan areas, there are also tons of local beauty supply stores that carry human hair extensions as well.  You just might find what you’re looking for.

For glamorous and a various array of colors and textures, here are  some of my favorite brands that include:

Online vs. retail store

Whether you choose to buy your hair extensions from a retail store or online,  the options could be overwhelming. If at a store, the sales representative will guide you through the options that match your color and texture well. The great thing about going to a retail store is that you can see and feel the hair and will feel confident about your purchase.

If buying online, you must narrow down your choices to the colors and textures to get the best possible match. Although you are not able to see and feel the hair the advantage is you can order them easily and conveniently. Some online companies have live chats that can give you a thorough consultation to get you the best options.

If buying online, you must narrow down your choices to the colors and textures to get the best possible match

The market is flooded with great companies the consumer can purchase directly. Now in most cases, if someone has a medium density hair that’s 12 inches to the shoulder,  you can easily blend in a set of hair extensions. However, if your hair is 12 inches and very thick density you will either need double the hair extension set to create a believable transition.  Another way to attach your clip in hair is to braid down the hair you want to add the extensions over. When I section and braid down the area I am able to create a seamless transition between the natural hair covering over top the extensions, erasing that hard blunt hair cut line that shows when your extensions look skimpy in between thick hair.

When purchasing human hair extensions, the price may vary depending on the color, texture, and length.

However, spending money on them one good time will be worth it. You can easily apply them or have your favorite hairdresser use them on you to make your hairstyles looking voluminous.  You could even color them a deeper shade if you decide to wear a darker color. Attempting to lighten extensions are not recommended. Since hair cannot develop oils to preserve the hair, lightening agents will only dry them out making them dull and damaged. so its best to deepen them instead of attempting to lighten them.  Giving extensions deep conditioners and treatments are great as well. It helps keep them soft and manageable especially if they have constant wear and tear

Applying and styling

Clip on hair extensions is the quickest and safest method of augmenting your hair. When washing them its best to tie them all up together and tie with a hair tie and wash as a ponytail. This is because hair needs some time to dry after washing its best to a 1 day to a few days before to save time. Once extensions are clean and dry you can shape them.  

When clipping the hair extensions on to hair you want to measure the sections and clip the size that matches the section. Backcomb roots and spray a flexible hold hair spray on the tease to prevent hair from sliding. Comb onto and snap them in place them Depending on the look I am doing. I will pre curl or straighten extensions to the end desired look. Doing this helps not tug on the hair when styling or curling is done.

When washing them its best to tie them all up together and tie with a hair tie and wash as a ponytail

Now you are ready to get the look started. wash and condition your hair. after detangling blow dry hair 50 percent and then add your styling products to your damp hair. section off the hair and round brush hair to a blow-dried finish.

If wearing a  wavy to curly style. Have your pre-curled hair handy. Clip in hair extensions to your head and wave or curl your hair to match the wave pattern. For uniform curls, curl the hair in the same direction and for a tousled natural finish opt for curling hair in different directions for a softer look.

When wearing flat iron straight hair, place extensions first in their positions on to blow-dried hair. After they are clipped on, start from the bottom first and flat iron both extensions and hair to make hair blend seamless and flat together. Continue up the top layers till all hair is flat together with the extensions.   Polish up straight tresses with finishing hair spray or add gloss drops for a glass-like finish

Removing and storing away

I never recommend sleeping with clip in hair extensions left on your head. They are meant to be worn and taken down after each use. When you sleep, you toss and turn and the constant tugging on strands can lead to irritation of the scalp or worse pull on the hair that the hair extensions are mounted on to. Clip-in hair extensions are for temporary use. The combs on clips face down when snapped in place tight and need to be unsnapped and lifted up when removing.

Clip-in hair extensions are meant to be worn and taken down after each use.

When removing after use, you will want to section off hair a bit a time and unsnap and slide up and away from the backcomb.  Gently detangle the hair extensions and store them together like a ponytail. If curled you can toss them into a satin small pouch or even a plastic ziplock bag. They will naturally bend and set like a roller keeping the shape intact. If extensions are straight. detangle then gently and place them flat between a pillowcase. unless changing the look from curly to straight, there is no need to re-wash and style. Simply put away and reclip on when needed.  Detangle your own hair and proceed to wash and condition your hair like normal and when ready to use again the hair will be ready to be clipped right back in.

The Hottest 2019 Hairstyle Trends


The number one trend I see big in 2019 is layers. Shaggy layers, choppy layers, and choppy side bangs. Movement in a haircut is coveted this upcoming season. Shape and texture are what is leading the trends. Girls are trading their one length lobs for the shaggy choppy layered bobs or just adding the choppy bang.

Long Layers

They are a great way to give a new look without compromising length. By adding layers the look instantly changes by making movement in the hair. Waves and curls look really voluminous and the detail of the shape really shows through these styles.  Layers also give maximum volume on heavy and long hair. When blow drying layers the ends of hair must be smooth in order to transition into the other layers that follow. You will want to section the hair and work from the bottom layers into the top layers.

Layers give maximum volume on heavy and long hair

When using a larger brush the ends will have a straighter look while a smaller brush will give flip and curve to the ends of the hair. When styling bangs or layers shorter than your cheekbone a smaller brush will help give the layers direction and soft movement. Flipping the ends up emphasizing the shape and make oblong to long faces look more balanced. On round or square shaped faces, a deep side part or a choppy side bang will help to soften more harsh features giving attention to eyes and cheekbones.

Short Hair Cuts

Short hair is great whether you have amazing cheekbones or just love an easy carefree look. Short hair is not for the timid. Short hair can be just as striking and can give you a sophisticated look when dressing up. Not to mention how amazing earrings and necklaces look with very short hair. Women like Sharon Stone and Halle Berry are great examples of women with sexy pixie haircuts. We have seen them on the red carpet and they look just as stunning as women with long hair. Short hair puts your features on the forefront. If you have full lips or almond shaped eyes. Short hair will only emphasize it more.

Soft petite features like small noses, small ears, and small foreheads can flatter people with ultra short hair. The drastic short hair makes the features appear a bit larger and balanced. Blunt lines in a short hair cut are very harsh and can look masculine and hard. If your features are masculine opt for side sweeping bangs or shaggy cut layers you can tuck behind your ear.

The flow of feathery hair softens square jawlines and high forehead. If you have larger ears having more hair shagging over the ears look most flattering.  I personally love when the edges of a haircut are slightly longer creating a feathery wispy look.

A great example of shaggy short hair is Kris Jenner. Whether tucked behind the ear or wisped to the front the haircut remains very feminine and edgy. A longer variation of this cut would be the grown out shaggy Lisa Rinna cut flipped out ends that kick out and feather adds width and volume to small faces. Rounder faces will only appear more rounded and will not flatter fuller faces. Instead, have the layers shag toward the face and hugging the head for a more balanced look.

Natural texture

Another trend in 2019 is embracing natural curls and waves. Having a haircut that compliments your curls and waves. People are ditching the hot tools and blow drying for special occasions. More and more you see women and men embracing their bouncy locks and wearing them with confidence. Curls and waves can be shaped using the right products and either air drying or diffuser drying.  Depending on your hair texture products like mousse, gel, serum, wax, pomade, creamy lotions and leave in conditioners are great for styling and shaping natural curls.

Mousse, gel, serum, wax, pomade, creamy lotions and leave in conditioners are great for styling and shaping natural curls.

If your hair is fine and thin, a small amount of mousse on damp hair will help shape and amplify fine hair. The use of a diffuser will help give the hair body and pump the hair with volume. If your hair is thicker and needs more control a bit of natural hold gel can help tame thicker heads of hair. In the case that your gel might feel too stiff, layering the products with leave-in conditioner will diffuse the product and not make it as stiff.  Gels can be great however the stiffer the gel the more alcohol. Waxes and pomades are great to tame the hair after it dries. You can take dry curls and twirl with some creamy pomade to add shine and shape to curls. The hair will instantly look shiny and less frizzy. Serums can also add shine but have no hold. Serums just add shine and tame frizzies slightly

Color trends

Hair color has gone from punk 80’s rocker drastic to making people embrace their own natural grey hair and even creating a grey and pastel toned hair. my advice on color would be if you’re going to have a drastic color go for a more softer haircut or style. For example, think hot pink Marilyn Monroe pin-up hairstyle or a  blue classic bob. If the hair cut is asymmetrical or if the haircut is very edgy a soft hair color or highlights a couple of shades lighter would help soften the hard haircut lines. While a funky color and a haircut stand out. It may be too much to have at once. I feel like you appreciate the look if it’s not overpowered.   

Rule of thumb:  any shade that compliments your natural hue and 3 shades lighter are great for natural looking highlights. Eye color and skin color determine the best colors that suit you.  When staying in the range of colors that suit you the effect is very flattering.   Very fair skin looks best with cool toned colors.

Think Julianne Hough; ashy blondes, platinum, and neutral browns and ash brunettes work best.  If fair skin but have freckles and reddish undertones, copper, Auburn, and chestnut look amazing.  the warm reds bring out the reddish in the skin and make this skin glow. Think Amy Adams.

Rule of thumb:  Any shade that compliments your natural hue and 3 shades lighter are great for natural looking highlights

If your skin tans easily, it’s most likely you have warm undertones. Yellow, orange and bronze colored highlights would compliment the best. Think Jessica Alba. Warm to neutral full blond on this skin tone would be too monochromatic. Varying multiple shades on this skin would compliment the most. Choose neutral base colors and warmer highlights like Jennifer Lopez medium to dark skin tone that burns easily means a cool neutral toned compliment the most. Think Beyonce. Sandy browns and sandy looking neutral blond highlights would look amazing on this skin. Eye color can also help to determine what shades would compliment. Green eyes look great with Auburn and warm honey blonds whether full color or highlighted hazel eyes and like Tyra Banks or Rihanna they look great with golden and deep rich chocolate brown shades. Think Demi Moore. When you have dark eyes you must choose hair color with your skin.

Choosing a very dark color on fair skin with dark eyes can be very harsh. Having a medium brown or a soft light brown highlights on dark hair would suit much better. Think Eva Longoria. However, dark eyes and very dark hair on olive to warm skin the dark makes the skin glow. Think Pocahontas. Fair skin with piercing blue eyes looks amazing with black, deep brunette and rich burgundy merlot shades. the combination of the light eyes with the dark contrast makes for an exotic look. Think Elizabeth Taylor. When searching for the most suitable colors, reference people who’re skin resembles your skin color or your eye color. this will help in the process and can serve as a guide as to what color would compliment the best.

Styling and Formal hair

It’s no secret that old Hollywood hairstyles are a top requested for formal events, weddings and gala hair. Something about polished updos or glamorous waves still look timeless today. Although those looks will be seen in this coming year, girls are pairing simple tresses and elegant looks and pushing to new trends.

High long ponytails

Ponytails are not just for the gym. They can give you a youthful, modern and elegant look. If your hair is too short or too thin extensions can be added for length and thickness for a healthy looking head of hair.  ponytails could also be braided for an edgy goddess look or curled for a romantic look.

Pin straight hair

another timeless look the ever so popular Cher hair. the classic length beyond the waist.  Beautiful simple and very elegant. extensions can be added for dramatic lengths.

Flat ironed bobs

Simple chic bobs, flat ironed straight or lightly curled look amazing. These cuts blew dry or styled give a modern twist to formal hair. Paired with gorgeous jewelry and fancy gowns they compliment in a very fun way.

The wet look

The wet look is going to be popular as well. Again wet looks paired with elegance and fancy jewelry and great makeup have a very edgy feel to them. First, you want to dry the hair 50 % and add a product that gives a wet look but not too stiff. A mousse or soft gel would work well. Thicker textures would need a stronger gel or layering of pomades and waxes as well.  Let hair air dry or use the diffuser for quicker results. This look flatters wavy to slightly curled hair. hair that is too curly would need to be smoothed out to give the softer curl appearance. you can tuck hair behind ears or slick hair away from the face