Recent Posts

Protect Your Hair Color & Fight Humidity: Top Tips for Vibrant Locks All Summer


Introduction

Summer is the perfect time to show off your gorgeous hair color, but the season can also take a toll on its vibrancy and leave you battling frizz due to high humidity. In this comprehensive guide, we’ll discuss how to prevent hair color from fading during the summer months and share essential hair products for humidity. By understanding the causes of color fading, your hair type, and implementing best practices to protect your hair, you can keep your locks vibrant, healthy, and frizz-free all summer long.

Causes of Hair Color Fading in Summer

There are several factors that contribute to hair color fading in the summer:

  1. Sun exposure: Prolonged exposure to the sun’s UV rays can damage the hair cuticle, making it more susceptible to fading.
  2. Chlorine and saltwater: Swimming in chlorinated pools and saltwater can strip your hair of its color, causing it to fade faster.
  3. Heat styling: Using heat styling tools frequently can cause hair color to fade, especially when combined with other summer stressors.
  4. Over-washing: Washing your hair too often can strip its natural oils and color, making it look dull and faded.

Understanding Hair Types and Humidity

Hair types react differently to humidity, which is why it’s essential to know your hair type and how it responds to the summer climate. Hair with a porous hair shaft is more prone to frizz, as it absorbs moisture from the air, causing the hair shaft to swell. Understanding your hair type will help you select the right hair care products and techniques to keep your hair game strong throughout the summer.

Best Practices to Protect Your Hair Color and Prevent Frizz

To keep your hair color vibrant and avoid frizz during the summer months, follow these best practices:

  1. Limit sun exposure: Wear a wide-brimmed hat or use a UV-protectant spray to shield your hair from the sun’s harmful rays.
  2. Avoid over-washing: Shampoo your hair every 2-3 days instead of daily, and use a sulfate-free shampoo to preserve your color.
  3. Use heat protectants: Apply a heat protectant spray or serum before using heat styling tools to minimize damage and frizz.
  4. Condition regularly: Deep-condition your hair once a week to keep it hydrated and healthy.
  5. Opt for cooler water: Rinse your hair with cool water instead of hot, as high temperatures can strip color from the hair and cause frizz.
  6. Dry your hair gently: Use a microfiber towel or a soft cotton T-shirt to gently dry your hair, as this can help prevent frizz and breakage.

Essential Hair Products for Summer

Invest in quality hair care products that are specifically formulated to protect your color and fight humidity:

  1. Color-safe shampoo and conditioner: These products gently cleanse your hair and help maintain your color’s vibrancy.
  2. UV-protectant spray: This product acts as a barrier against the sun’s rays, reducing color fading caused by UV exposure.
  3. Anti-humidity products: Serums and styling products designed to combat frizz and humidity can help your hair maintain its smooth and sleek appearance.
  4. Deep-conditioning treatment: A weekly hair mask or treatment will keep your hair hydrated and help prevent color from fading.
  5. Dry shampoo: Using a dry shampoo between washes can help absorb excess oil and product buildup, keeping your hair fresh and your color vibrant.

Hair Care Tips for Swimmers

If you love swimming during the summer, follow these tips to protect your hair color and fight frizz:

  1. Pre-soak your hair: Before diving in, wet your hair with clean water to prevent it from absorbing as much chlorine or saltwater.
  2. Wear a swim cap: A silicone or latex swim cap can help protect your hair from the harsh effects of pool chemicals and saltwater.
  3. Rinse immediately: After swimming, rinse your hair thoroughly with clean water to remove any lingering chlorine or salt.
  4. Use a clarifying shampoo: Once a week, use a clarifying shampoo to remove any buildup from pool chemicals or saltwater, ensuring that your hair and scalp stay clean and healthy.

Transitioning from Summer to Autumn Hair Care

As the summer solstice gives way to the autumn equinox, it’s essential to adjust your hair care routine to accommodate the changing meteorological seasons. In the southern hemisphere, this transition occurs in reverse. Here are some tips to help you transition from summer to autumn hair care:

  1. Reevaluate your shampoo and conditioner: As the weather cools and humidity decreases, you may need to switch to shampoos and conditioners that are more moisturizing for color-treated hair.
  2. Maintain heat protection: Continue using heat protectants when styling your hair, as cooler temperatures can still cause damage.
  3. Use a leave-in conditioner: A leave-in conditioner can help protect your hair from the elements and maintain its moisture during the cooler months.
  4. Schedule a trim: Regular trims help keep your hair looking healthy and free of split ends, ensuring that your color looks fresh and vibrant.

Conclusion

By taking the necessary precautions and understanding your hair type, you can prevent hair color from fading and combat frizz during the summer months. Make sure to limit sun exposure, follow best practices for hair care, invest in essential hair products, and take extra steps if you’re a swimmer. As the season changes, adjust your hair care routine to maintain your stunning hair color and healthy locks all year round. With these tips, you’ll be able to enjoy your vibrant and frizz-free hair throughout the summer and beyond.

Tame Your Mane: Styling Hair in Humidity


Introduction: Master Your Hair Game in Humid Conditions

Humidity can be your hair’s worst enemy, causing frizz, flyaways, and unmanageable locks. This comprehensive blog post will guide you through essential hair care tips, hair products for humidity, and styling techniques to help you prevent frizz and maintain your hair game even in the most humid conditions. Understanding hair types, the hair shaft, and how humidity interacts with hair care products is crucial for conquering the effects of humidity.

Hair Types and Humidity

1.1 Understanding Your Hair Type

Knowing your hair type is the first step in selecting the right hair care products and techniques to combat humidity. Hair types are generally classified as:

  • Straight (Type 1)
  • Wavy (Type 2)
  • Curly (Type 3)
  • Coily (Type 4)

Each hair type reacts differently to humidity, so it’s essential to tailor your hair care routine accordingly.

1.2 How Humidity Affects the Hair Shaft

Humidity causes the hair shaft to absorb moisture from the air, leading to swelling and changes in the hair’s structure. This results in frizz and a lack of definition, especially for wavy, curly, and coily hair types. Hair cuticles, the outermost layer of the hair shaft, open up when exposed to moisture, making the hair more susceptible to frizz.

Essential Hair Products for Humidity

2.1 Anti-Humidity Products

Anti-humidity products create a barrier on the hair shaft to prevent moisture absorption. Some popular options include:

  • Silicone-based serums: These serums form a protective layer on the hair shaft, sealing in moisture and preventing frizz.
  • Anti-frizz creams: These creams help control frizz and flyaways by smoothing the hair cuticle.
  • Hair oils (e.g., argan, coconut, or marula oil): These natural oils nourish and protect the hair, providing a barrier against humidity.

2.2 Styling Products

Using the right styling products can help maintain your desired hairstyle in humid conditions. Some recommendations are:

  • Mousse for volume and hold: Apply mousse to damp hair to achieve long-lasting volume and hold in humid weather.
  • Gel for definition and control: Hair gels provide strong hold and definition, making them ideal for keeping hair in place during humid conditions.
  • Curl creams for enhanced curls and waves: These creams hydrate and define curls, helping them retain their shape in humidity.

2.3 Heat Protection

If you use heat styling tools, always apply a heat protectant to shield your hair from damage and lock in your style. These products create a barrier between your hair and the heat, reducing the risk of damage and helping your style last longer in humid conditions.

Hair Care Tips for Humidity

3.1 Washing and Conditioning

Wash your hair with a gentle, sulfate-free shampoo to avoid stripping your hair of its natural oils. Follow up with a moisturizing conditioner to nourish and hydrate your hair. Look for products specifically formulated for your hair type and designed to combat frizz and humidity.

3.2 Drying Techniques

Gently squeeze out excess water with a microfiber towel or an old t-shirt to prevent frizz. Allow your hair to air dry or use a diffuser attachment on your hairdryer to maintain your hair’s natural texture. Avoid rubbing your hair vigorously with a towel, as this can cause breakage and frizz.

3.3 Hair Treatments

Deep conditioning treatments and hair masks can help strengthen and moisturize your hair, making it more resistant to humidity. Look for treatments containing ingredients like keratin, proteins, and natural oils to provide the most benefits. Aim to use a deep conditioning treatment or hair mask once a week to keep your hair healthy and hydrated.

3.4 Regular Trimming

Regularly trimming your hair helps to prevent split ends and maintain your hair’s overall health. Aim to trim your hair every 6-8 weeks to keep it in its best condition.

Styling Techniques for Humid Weather

4.1 Protective Styles

Protective styles like braids, twists, and updos can help shield your hair from humidity and minimize frizz. These styles keep your hair in place and reduce exposure to the elements, making them perfect for combating humidity.

4.2 Use a Wide-Tooth Comb

To detangle your hair, use a wide-tooth comb instead of a brush to reduce breakage and frizz. Start at the ends of your hair and gently work your way up to the roots, being careful not to pull or tug on your hair.

4.3 Embrace Your Natural Texture

Sometimes, it’s best to work with your hair’s natural texture instead of fighting against it. Use products and techniques designed for your hair type to enhance your natural curls, waves, or straight strands. This will not only save you time but also help your hair look its best in humid conditions.

4.4 Use Hair Accessories

Hair accessories like headbands, hairpins, and hair ties can help keep your hair in place and add a touch of style to your look. Experiment with different accessories to find the ones that best suit your hair type and personal style.

Lifestyle Tips for Managing Humidity

5.1 Stay Hydrated

Drinking enough water is essential for maintaining healthy hair. Staying hydrated helps keep your hair moisturized from the inside out, making it less prone to frizz and damage caused by humidity.

5.2 Maintain a Balanced Diet

A balanced diet rich in vitamins and nutrients is crucial for hair health. Incorporate foods high in protein, iron, zinc, and vitamins A, C, and E into your diet to promote healthy hair growth and minimize the effects of humidity.

5.3 Sleep on a Satin or Silk Pillowcase

Sleeping on a satin or silk pillowcase can help reduce frizz and breakage caused by friction from traditional cotton pillowcases. The smooth surface of satin and silk pillowcases helps your hair glide across the pillow, preventing tangles and frizz.

Conclusion: Winning the Hair and Humidity Battle

By understanding your hair type, using the right hair products for humidity, and employing proper hair care tips and styling techniques, you can prevent frizz and keep your hair looking fabulous in any weather. Remember that consistency and patience are key when adapting your hair care routine to combat humidity. With time, your hair will be better equipped to handle even the most humid conditions. Stay dedicated to your hair care routine, and soon enough, you’ll be winning the battle against humidity.

Mastering Lace Front Wigs: A Comprehensive Guide to Selection, Application, and Maintenance


Lace front wigs have become a popular choice for those seeking a natural-looking, versatile hairstyle. As a hairstylist with over 20 years of experience, I’ve gathered valuable insights into how to choose, apply, and maintain these wigs. In this comprehensive guide, we’ll explore everything you need to know about lace front wigs to ensure you achieve the perfect look every time.

Understanding Lace Front Wigs

What are Lace Front Wigs?

Lace front wigs are hairpieces designed with a sheer lace base at the front, giving the illusion of a natural hairline. The rest of the wig is often constructed with a variety of materials, such as wefts or a combination of lace and wefts, depending on the desired level of customization and price point.

Benefits of Lace Front Wigs

Lace front wigs offer several advantages over traditional wigs, such as:

  1. Natural-looking hairline: The sheer lace material blends seamlessly with the skin, creating a realistic hairline appearance.
  2. Versatility: Lace front wigs allow for various styling options, including pulling the hair back and parting it in different ways.
  3. Breathability: The lace material provides better airflow than traditional wigs, making them more comfortable to wear, especially in warm weather.

Choosing the Perfect Lace Front Wig

Material: Synthetic vs. Human Hair

When selecting a lace front wig, one of the first decisions you’ll need to make is whether to opt for synthetic or human hair. Synthetic wigs are affordable and low-maintenance, but they may not look as natural or last as long as human hair wigs. Human hair wigs, on the other hand, offer a more realistic appearance and can be styled like natural hair, but they often come with a higher price tag.

Lace Types: Swiss, French, and HD Lace

The lace on a wig can significantly impact its appearance and comfort. Swiss lace is thin, delicate, and blends well with the skin, while French lace is slightly thicker but more durable. HD (high-definition) lace is ultra-thin and nearly invisible, making it the most natural-looking option.

Cap Construction: Full Lace vs. Lace Front

Full lace wigs offer the most versatility, with lace covering the entire cap, allowing for various parting and styling options. Lace front wigs, however, only have lace at the front, but they are more affordable and easier to apply.

Density and Texture

Wigs come in various densities, ranging from thin to extra thick. Consider your personal preference and the style you wish to achieve when selecting a wig density. Additionally, lace front wigs are available in various textures, such as straight, wavy, and curly, to suit different hair types and styling preferences.

Color

Lace front wigs come in a wide range of colors, including natural hair shades and bold, fashion-forward hues. When choosing a color, consider your skin tone, natural hair color, and desired look. Some wigs even offer highlights or ombre options for added dimension.

Application Techniques for a Flawless Fit

Preparing Your Natural Hair

Before applying your lace front wig, make sure your natural hair is clean, dry, and styled appropriately. For those with long or thick hair, consider braiding or wrapping your hair to create a smooth, flat surface for the wig.

Wig Cap Application

A wig cap is essential to protect your natural hair and create a base for the wig. Gently stretch the cap over your head, ensuring all of your hair is tucked inside and the cap is secure. Some people prefer using a nude or skin-toned cap to enhance the natural appearance of the wig.

Preparing the Lace Front Wig

Before applying the wig, trim the lace carefully along the hairline, leaving a small amount of lace for blending purposes. Customize the wig to your liking by tweezing the hairline, creating baby hairs, or adjusting the parting.

Applying the Lace Front Wig

  1. Position the wig on your head, aligning the front edge of the lace with your natural hairline. Use hairpins to secure the wig temporarily.
  2. Apply a thin layer of wig adhesive or tape along your hairline, being careful to avoid contact with your natural hair. Alternatively, you can use a gel-based solution for a temporary hold.
  3. Carefully press the lace onto the adhesive, adjusting the wig’s position as needed. Use a fine-tooth comb or your fingertips to smooth the lace and ensure it adheres evenly.
  4. Once the adhesive is dry, gently remove the hairpins and style the wig as desired.

Maintenance Tips for Longevity and Style

Washing Your Lace Front Wig

Properly washing your lace front wig is essential for maintaining its appearance and durability. Use a sulfate-free shampoo and conditioner specifically designed for wigs, gently massaging the products into the hair. Rinse with lukewarm water, being careful not to tangle the hair.

Drying and Styling Your Wig

After washing, gently pat the wig dry with a towel before placing it on a wig stand to air dry. Avoid using high heat on synthetic wigs, as it can cause damage. For human hair wigs, use heat protectant products and style with care.

Storing Your Lace Front Wig

Proper storage is crucial to maintaining your wig’s appearance and longevity. Store your lace front wig on a wig stand or mannequin head to preserve its shape and prevent tangling. Keep the wig away from direct sunlight, heat, and moisture to avoid damage or color fading.

Regular Maintenance

Regularly brush your wig with a wide-tooth comb or wig brush to prevent tangling and matting. For human hair wigs, use a leave-in conditioner to keep the hair hydrated and healthy.

Conclusion

Lace front wigs offer an unmatched level of versatility, comfort, and natural appearance for those looking to change up their hairstyle. By understanding the different options available, mastering the application process, and following proper maintenance techniques, you can enjoy a flawless lace front wig experience every time. This comprehensive guide is your one-stop resource for all things lace front wigs, ensuring you achieve the perfect look and style for any occasion.

DIY Hair Bleaching: The Ultimate Guide to Achieving Salon-Quality Results at Home


Do you want to bleach your own hair and achieve salon-quality results without breaking the bank? As a hairstylist with over 20 years of experience, I’m here to guide you through the DIY hair bleaching process, from choosing the right products to avoiding common mistakes. This comprehensive guide will cover everything you need to know, ensuring that you feel confident and well-prepared to tackle your at-home hair transformation.

1. Essential Products and Tools for At-Home Hair Bleaching

To achieve the best results, gather these essential products and tools for your DIY hair bleaching project:

  • Hair bleach powder
  • Developer (20, 30, or 40 volume)
  • Mixing bowl and tint brush
  • Gloves
  • Old clothes and towels
  • Sectioning clips
  • Hair conditioner or coconut oil
  • Toner (optional)
  • Timer

2. Choosing the Right Hair Bleach and Developer

Selecting the appropriate bleach powder and developer is crucial for your desired level of lightening. For instance, a 20-volume developer lifts 1-2 shades, while a 30-volume developer lifts up to 3 shades. A 40-volume developer can provide significant lightening for dark hair but carries a higher risk of hair damage.

3. Hair Bleaching Step-by-Step Guide

Follow this step-by-step guide to successfully bleach your hair at home:

  1. Protect your clothes and skin by wearing old clothes and gloves.
  2. Section your hair into four equal parts.
  3. Mix the bleach powder and developer according to the manufacturer’s instructions.
  4. Apply a thin layer of conditioner or coconut oil to your scalp to protect it from irritation.
  5. Starting at the back of your head, use the tint brush to apply the bleach mixture to your hair, avoiding the roots initially.
  6. Continue applying the bleach, working your way towards the front sections of your hair.
  7. Once all hair sections are covered, go back and apply bleach to the roots.
  8. Set a timer according to the bleach manufacturer’s instructions, typically between 30-45 minutes.
  9. Conduct a strand test to check the progress.
  10. Rinse your hair thoroughly with lukewarm water, then shampoo and condition.

4. Tips for a Safe and Effective Hair Bleaching Process

Ensure a smooth bleaching experience by following these safety tips:

  • Perform a patch test 48 hours before bleaching to check for allergies or sensitivities.
  • Avoid washing your hair for 24-48 hours before bleaching to maintain natural scalp oils.
  • Work quickly to ensure even application and results.
  • Avoid overlapping bleach on previously lightened hair to prevent damage.
  • Keep an eye on the timer and check your hair regularly to avoid over-processing.

5. Common DIY Hair Bleaching Mistakes and How to Avoid Them

Be mindful of these common hair bleaching mistakes to achieve the best outcome:

  • Uneven results: Apply bleach evenly and use sectioning clips for better control.
  • Over-processed hair: Deep condition your hair and use a protein treatment to repair damage.
  • Brassiness: Use a toner or purple shampoo to neutralize yellow and orange tones.

6. Post-Bleaching Hair Care and Maintenance

Following the bleaching process, it’s essential to take proper care of your hair to maintain its health and color:

  • Use sulfate-free shampoos and conditioners to preserve hair health.
  • Deep condition your hair weekly to replenish moisture and nourishment.
  • Limit heat styling and always use a heat protectant when necessary.
  • Trim your hair regularly to prevent split ends and further damage.
  • Apply a leave-in conditioner or hair oil to keep your hair hydrated and manageable.
  • Opt for color-safe shampoos to prolong the life of your new hair color.
  • Schedule regular touch-ups to maintain your desired level of lightness.

7. Hair Color Ideas and Inspiration

Once you’ve successfully bleached your hair, you may want to explore a range of hair color ideas to enhance your new look. Below are some popular options for those with freshly lightened hair:

  • Ombre: Create a seamless gradient from your natural or darker roots to your lightened ends for a low-maintenance style.
  • Balayage: This hand-painted technique offers a natural-looking, sun-kissed effect that requires minimal upkeep.
  • Pastel hues: Pastel colors like lavender, pink, or baby blue can add a fun and whimsical touch to your lightened hair.
  • Vivid shades: For a bold statement, consider rich, vibrant colors like red, teal, or purple.
  • Platinum or icy blonde: Embrace the ultra-light look by toning your bleached hair to a platinum or icy blonde shade.
  • Silver or gray: Tap into the trendy gray hair movement with a silver or gray hue that adds sophistication and edge to your style.

8. Hair Bleaching Process for Different Hair Types and Colors

Different hair types and colors may require specific approaches during the hair bleaching process. Here’s what you need to know:

  • Fine hair: Fine hair typically lightens more quickly, so closely monitor the processing time to prevent damage.
  • Coarse or curly hair: This hair type might need more time to lighten and may require additional conditioning to maintain moisture.
  • Dark hair: Darker hair often requires a higher volume developer and longer processing time to achieve the desired level of lightness. Multiple bleaching sessions may be necessary, with at least a week between each session to minimize damage.
  • Previously colored hair: Hair that’s been previously dyed may be more challenging to bleach, and it’s essential to avoid overlapping bleach on already-lightened sections.

9. How to Repair Over-Processed or Damaged Hair

If your hair becomes over-processed or damaged during the DIY hair bleaching process, take the following steps to restore its health:

  • Use a protein treatment: Protein treatments can help rebuild and strengthen the hair structure.
  • Deep condition regularly: Intensive conditioning treatments can restore moisture and nourishment to damaged hair.
  • Apply hair oils: Hair oils, like argan or coconut oil, can provide essential hydration and smoothness to damaged hair.
  • Limit heat styling: Give your hair a break from heat styling tools to prevent further damage.
  • Schedule regular trims: Trimming damaged ends can help maintain your hair’s overall health and prevent further breakage.

10. How to Maintain Your Hair’s Health Post-Bleaching

Post-bleaching, it’s crucial to prioritize your hair’s health to keep it looking and feeling its best. Follow these maintenance tips:

  • Wash your hair less frequently: Over-washing can strip your hair of natural oils. Opt for dry shampoo between washes to maintain freshness.
  • Use a wide-tooth comb: A wide-tooth comb can help detangle your hair without causing breakage.
  • Sleep on a satin or silk pillowcase: These materials can reduce friction and help prevent damage while you sleep.
  • Stay consistent with hair treatments: Continue using deep conditioning and protein treatments to maintain your hair’s health and integrity.

11. Post-Bleaching Hair Care and Maintenance

Following the bleaching process, it’s essential to take proper care of your hair to maintain its health and color:

  • Use sulfate-free shampoos and conditioners to preserve hair health.
  • Deep condition your hair weekly to replenish moisture and nourishment.
  • Limit heat styling and always use a heat protectant when necessary.
  • Trim your hair regularly to prevent split ends and further damage.
  • Apply a leave-in conditioner or hair oil to keep your hair hydrated and manageable.
  • Opt for color-safe shampoos to prolong the life of your new hair color.
  • Schedule regular touch-ups to maintain your desired level of lightness.

Conclusion:

Bleaching your hair at home can be an empowering and cost-effective way to achieve a new look. By following this comprehensive guide, you can feel confident in your ability to safely and effectively bleach your hair while avoiding common pitfalls. Remember to be patient and give your hair the love and care it deserves post-bleaching. Enjoy your stunning hair transformation!

Unraveling the Secrets of Relaxed Hair: The Ultimate Guide


Are you on the quest for understanding and maintaining beautiful relaxed hair? You’ve come to the right place, as we have all the information you need to keep your locks looking fabulous and healthy, whether you’re transitioning from natural hair or simply looking for the best ways to care for relaxed hair.

Relaxed hair refers to hair that has undergone a chemical process using a relaxer to break down the natural curl pattern, resulting in permanently straightened hair. This treatment is commonly used by individuals with naturally curly or coily hair who desire a sleek, straight look. As we dive deeper into the world of relaxed hair, we will cover everything from types of relaxers to essential tips for maintaining healthy, relaxed hair.

Stay with us, as we have more valuable information to share about relaxed hair, including tips for maintaining healthy locks, how often to relax your hair, and potential risks associated with relaxers.

Understanding Relaxers and the Hair Relaxing Process

Relaxers are chemical treatments designed to break down the disulfide bonds in the hair’s protein structure, altering the hair shaft’s composition. The primary ingredient in most relaxers is sodium hydroxide, also known as lye. When applied to hair, relaxers weaken the hair shaft, allowing the hair to be reshaped into a straighter form. This chemical process is irreversible, meaning that the hair’s original curl pattern cannot be restored without growing out the treated hair and cutting off the relaxed ends.

Hair professionals recommend conducting thorough research and consulting a stylist before deciding to undergo a relaxer treatment. Additionally, it’s essential to perform a patch test to ensure you don’t have an adverse reaction to the chemicals.

Types of Relaxers: Lye vs. No-Lye

There are two main types of relaxers: lye and no-lye relaxers. Lye relaxers contain sodium hydroxide, which effectively breaks down the hair’s bonds to straighten the hair. No-lye relaxers, on the other hand, contain calcium hydroxide as the primary ingredient. These relaxers are gentler on the scalp but can cause calcium buildup on the hair shaft, making it essential to use a clarifying shampoo regularly. Choosing the right type of relaxer depends on your hair type, scalp sensitivity, and personal preferences.

Tips for Healthy Relaxed Hair

  • Deep conditioning: Regular deep conditioning is vital for maintaining moisture, preventing breakage, and promoting overall hair health in chemically treated hair.
  • Heat styling: When using heat-styling tools, always apply a heat protectant to minimize heat damage. Avoid excessive heat styling to preserve the integrity of your relaxed hair.
  • Regular trims: Trimming your hair every 6-8 weeks helps prevent split ends and maintain healthy hair growth.
  • Gentle handling: Be gentle with your hair, and avoid excessive combing and brushing, as relaxed hair is more prone to breakage.
  • Use appropriate products: Choose hair care products specifically formulated for relaxed hair to ensure the best results.

The Ideal Relaxing Schedule and Hair Growth

The frequency at which you should relax your hair depends on individual factors such as hair growth rate and personal preferences. Generally, experts recommend waiting at least 8-10 weeks between relaxer treatments to allow for new growth and to minimize the risk of over-processing. Monitoring your hair growth will help you establish the right schedule for relaxing treatments, ensuring that your hair remains healthy and vibrant.

How Long Does a Relaxer Last?

A relaxer’s effects are permanent, and the treated hair will remain straight until it is cut off. However, as new hair grows, the roots will maintain their natural texture, and touch-ups will be necessary to maintain a uniform appearance. It’s essential to keep track of your hair growth and plan touch-ups accordingly to maintain the desired look.

The Impact of Relaxers on Hair Health

Relaxers can potentially damage hair if used improperly or too frequently. Over-processing can lead to hair breakage, thinning, and scalp irritation. It’s essential to follow a healthy hair care regimen, be gentle with your hair, and consult a professional stylist to minimize potential damage.

Hair loss can also be a concern for individuals who use relaxers, as the chemical process can weaken the hair shaft, making it more susceptible to breakage. Ensuring that you follow a proper hair care routine, get regular trims, and consult a professional stylist will help mitigate the risk of hair loss.

Caring for Different Hair Types after Relaxing Treatments

Whether you have naturally curly, coily, or wavy hair, it’s essential to adapt your hair care routine to your specific hair type after undergoing a relaxing treatment. Here are some tips for caring for various hair types post-relaxer:

  • Straight hair: Focus on maintaining moisture and protecting your hair from heat damage. Use lightweight hair products to avoid weighing your hair down.
  • Curly hair: Ensure that you deep condition regularly and use products designed for chemically treated curly hair. Avoid using heavy styling products that can weigh your curls down.
  • Coily hair: Intense hydration is crucial for maintaining healthy, relaxed coily hair. Opt for rich, moisturizing products and deep conditioning treatments to keep your hair soft and supple.

Transitioning from Natural Hair to Relaxed Hair

If you’re considering making the switch from natural hair to relaxed hair, it’s essential to understand the necessary steps and adjustments to your hair care routine. Consult a professional stylist to guide you through the process and ensure that your hair remains healthy and vibrant throughout the transition. They can provide personalized advice on the best relaxer type for your hair and the ideal relaxing schedule.

Additionally, it’s crucial to be patient during the transition process, as it may take time to adapt to new hair care routines and techniques. Following the tips outlined in this guide for maintaining healthy relaxed hair, such as deep conditioning, heat styling precautions, and regular trims, will help ensure that your hair remains strong and beautiful as you make the transition from natural to relaxed hair.

In conclusion, understanding the nature of relaxed hair, the effects of relaxers on hair health, and the importance of proper hair care for different hair types is crucial for making informed decisions and maintaining healthy, beautiful locks. With proper care, you can enjoy the benefits of relaxed hair while minimizing potential risks.

Remember to consult a professional stylist to ensure you’re making the best choices for your unique hair needs, whether you’re transitioning from natural hair or simply seeking expert advice on how to care for relaxed hair.

How to Price Your Services Without Discounts | A  Hairstylist’s Rulebook


It can be overwhelming at first when either starting a salon business or when you grow as a professional and need to take your prices to the next level. There are a few key points that can help make this process simple and create your own hairstylist rulebook.

The main staples when pricing your services are going to be to create your base price according to your skill, offer more value to your services, continue to learn,  become a specialist with the services you excel at, and offer rewards for clients who rebook future appointments and add value to your services as a professional.

Please take note of this: having constant discounts is not the way to creating a loyal clientele base.

Clients want the best stylist they can get and if you’re a professional who focuses on these main points your business is sure to flourish.

1. Create your base price

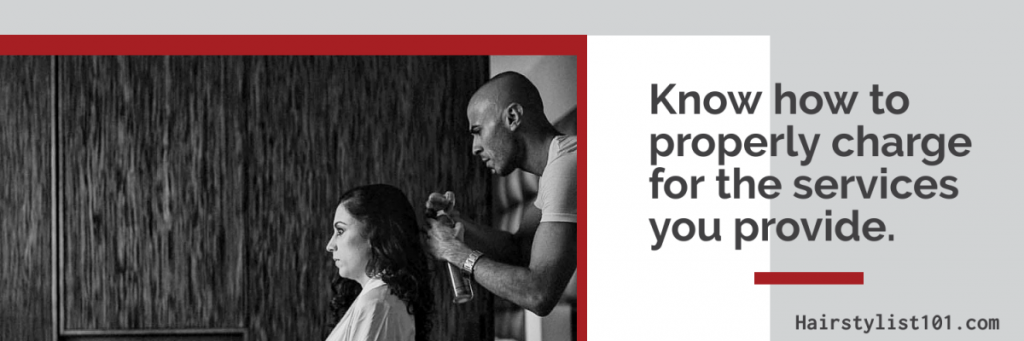
When pricing your services it is important to know how to properly charge for the services you provide. As a hairstylist who takes pride in their craft, the last thing you want to do is start bad habits. The area you live in and the demographics will determine what the base price for your services should be. A great way to base your prices is to find the salons or studios that you look up to and that offer the same level of customer service and similar services. The intent is not to compete for clients but to keep prices for specific services the same that way people can expect to pay a certain price without asking for discounts and understand that the service is standard.

When clients go shopping around for a stylist, they will feel inclined to compare your prices to another salon or other specialist and possibly say something along the lines like another salon would charge them much less. Your response when dealing with this type of client should be to tell them that is what the service cost and they can make their decision based on personality and consultation and not by price. It’s true that everyone loves a discount but the reduction of prices not only makes you look desperate but it also does not feel good to perform them especially on someone who does not respect your price at first meeting. Nevertheless, making it an uncomfortable first impression.

know how to properly charge for the services you provide


Also, if you have workers that work for you, they would probably not like to do the services for a reduced rate and feel like the clients will most likely only return for future discounts and will constantly ask for next offers to keep returning. These clients are also the worst to please because they will wear your patience out and nickel and dime you every time. Stand by your prices and let them know why you charge what you charge. If they choose to leave let them. No one wants to work on a person who does not respect you.

Experience and skill will play a part in how much to charge. There will come a time in your career that you cannot afford to give discounts, your level of experience and skill is too great to reduce your services. You will sacrifice being overwhelmed and take on a new clientele that will only follow you because you have lowered your rates, thus making this a bad idea. Your current clients will also not appreciate that you can not fit them in because of your new busy schedule.  There is a way to take care of people and my next tip will show you how.

2. Offer more value for your services

Offering some extra value to your services can be a fantastic way to build a great clientele and give appreciation to your services without giving away discounts. Your clients will feel like they are getting a treat and can make them feel like they are saving money the same way a discount feels without lowering the base price for your services.

Adding something of value creates a gift for the client and they appreciate it as such. You can give it to them as a complimentary and if they like it, it’s something they might want in the future and won’t mind paying for it because they know the value it has.

 a. Conditioning treatments

Conditioning treatments are a great additive to giveaway as a treat during slow seasons to help draw new clients and treat current clients and make them feel special without giving away discounts. Conditioning treatments should also be services you offer but can be given away during seasonal periods to give back to clients. The goal is to make them feel like you care enough to give value away but also introduce new services as well. Having it seasonally of for a few days out of the month will bring revenue and make people want to seek you to get the value you offer.

 b. Pink extensions for breast cancer awareness

We all know someone suffering from the dreaded monster that is cancer and we all wish we could do something to feel like we support. Giving away a human hairstreak of pink extensions in support of cancer is a way to not only show support by having a pink streak but it is something that you can give away as value and show support to clients as well.

Additionally, they might like the color so much they just might want you to color their hair, in the same way, making it a upsell for a color service they wanted.

 c. Free haircuts for donations over 10 inches during breast cancer awareness month

Clients will also feel compelled to donate their hair to the associations and feel great. A great idea to show support during cancer awareness month also is to give away free haircuts during certain days and times for donations over 10 inches.  And offer double added value to clients under 10 inches to give away something as well for their generous donation as well but not for free. You must state 10 inches or over to not get swamped with giving away free haircuts. Since most companies require more than 10 inches, giving away a free cut for those specific clients will be most effective during these times. This is a win-win situation because clients will receive a new look and donating will feel gratifying as well.

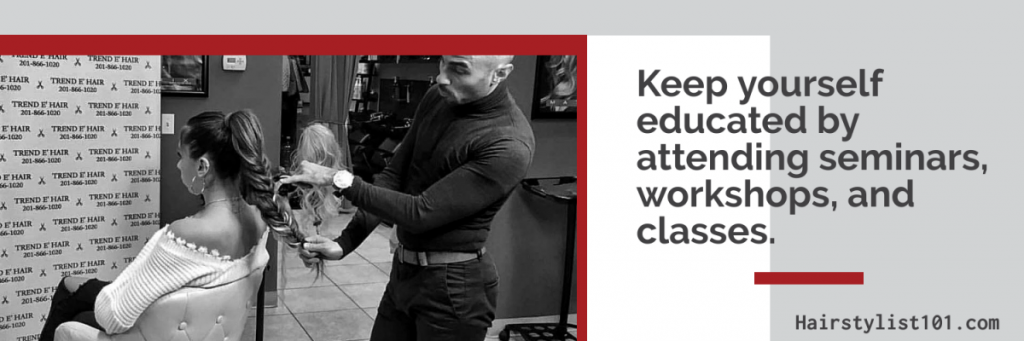
3.  Educate yourself and take workshops

A great way to avoid having to give services as discounts are to keep yourself educated by attending seminars, workshops, and classes. Not only classes for hair styling but workshops that teach people skills that make them business professionals. There are so many classes that color companies offer just by having a business account and give monthly or quarterly classes for their salon accounts.

These are great especially because they offer them for free just for being a great account. They will usually schedule classes at your convenience to help you and your staff learn how to properly mix color and introduce new products and new techniques by their top color specialist. This is a great thing to take advantage of especially during salon slow seasons.

Educate yourself and take workshops


Classes are recommended to learn a new style or a new service and can be a great investment in your career. When you learn a new technique and or a new service this is the equivalent of a raise. With new techniques learned you instantly become certified with a new skill.  A skill that demands a raise. When you invest in your craft and perform these new skills you are elevated to a new level.

Mentorship programs are another great way to network and to keep you elevated as well In your career. When you surround yourself with other salon professionals who educate themselves and continue education your professionalism changes and people don’t expect discounts. They can feel your confidence as a stylist and they know you are a person who is an expert and they respect your prices.

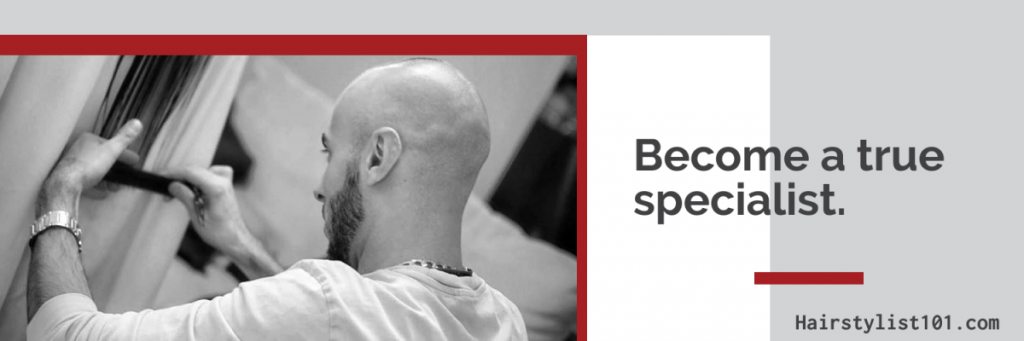
4. Become a true specialist

If there is a service you are great at or a service you are known for, it is imperative you promote your self for it.  when you become a specialist your reputation speaks volumes and the referrals are great as well. One of the great reasons to become a specialist is that you can devote your undivided attention to your craft. There are many people that specialize in many different services.

Being a color specialist allows you to concentrate on the client at hand and avoids having to juggle other services in between. Although it is true that doing both color and hair cuts and other services in a salon could be great, but the chance of clients asking for a package deal is more prominent. Salons that have specialists do great because each stylist works on the type of client they want and are able to give clients undivided attention which makes high paying clients appreciate this.

 devote your undivided attention to your craft


Also, being a master haircutter or an extension specialist allows you to stay in your creative niche and people will seek you for the amazing haircuts and hair length transformations you do as well. These services are specialized and when you perfect them your reputation grows and clients flock to you.

Having multiple specialists in salons provide individual services and makes the staff work in what they are good at making it a great environment for the stylist as well as the owner.

Salons that run on volume are always struggling to stay on schedule and juggle too many tasks. You could have a client with color while taking a hair cut in between, and have a client getting a chemical treatment and squeeze other services in between. This type of work schedule can burn out a hairstylist and make for a stressful environment.

5. Educate clients and speak service talk

Hairstylists are like therapists, doctors, confidants and can make you feel like family and friends. They can confide in you and become obsessed with the amazing way you make them look and feel. It is important you keep your professional level intact and always remain professional.

When a hairstylist meets a client for the first time, the hairstylist should ask questions regarding hair related topics. Like previous services, hair history and the future goals of the client. It should never be a negative conversation disregarding the last stylist or start off with how you are a better stylist. Your work will speak for itself and your reputation will precede you.

When consulting about color, you must listen and suggest accordingly.  A lot of times clients will attempt to lie because they are embarrassed or they don’t want to tell you they colored their own hair or worse not tell you everything. As professionals, it is our duty to explain why it is very important to communicate effectively to be able to give them the results they want and or the reason why something can’t be done.

If dealing with a person who might not be telling the truth a patch test should be done to prove the assessment.  Knowing how to do this is a skill because people don’t want to be told no, and feel that because they are paying you, you need to listen to them.

Indulging in gossip or getting too personal aside from hair related topics are not recommended either. To gossip about other stylist and or other people demotes your credibility and can make it hard for clients to respect your price increases.

It is a fantastic feeling to enjoy what you do and have fun at work. It’s great to offer a listening ear to clients and let them express themselves as well, but you as the professional should be able to defer them back and remain professional. When you overstep your boundaries and gossip along it makes for a slowing down of your work and busy stylist cannot afford to be distracted with this type of behavior.

What you choose to talk about says a lot about you as well. When you keep conversations about yourself to a minimum and keep the conversations about hair health and hair related topics the client will actually want to be educated which makes for upselling so much easier. They will be so excited about the new extensions you know how to do, or that chemical treatment that works wonders.  They will love coming to you because they trust you know how to take care of their hair and offer great things to make them look and feel great. After all, that is what we want to educate and to have the clients try great services.

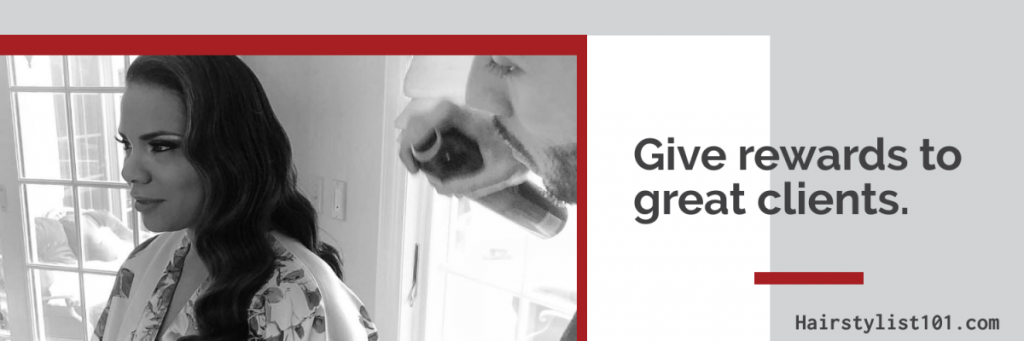
6. Give rewards to great clients

We all have those great clients we love who show up on time, who never get upset if we are running late and the ones who refer us to as many people as they know. Those are the people you want to grant rewards for. It does not mean to give them discounts but you can offer value to them as well. They are the clients you may want to try the new products on. Or the clients you may want to gift them an extra service like curls or a complimentary flatiron style. They will appreciate it and continue to be the amazing client they are.

Give rewards rewards for great clients


Another great thing to provide for them would be to give them a free service for their birthday and or special occasion. They will be so grateful because they know how much you appreciate them and their business and will continue to support you and your salon business as well.

7. Have clients participate in a free makeover giveaway

Lastly, my top tip for creating services without having to discount services would be to have them participate in a total salon, makeover with your top services. this will be a great incentive to get new clients and to keep great rapport with current clients.  Everyone loves the idea of winning a makeover and feeling like they got pampered for free.

It can be something they can use for themselves or someone else they feel deserving. Which is great if they pass it along because you will now have made a new client in the process.

This is a great way for people to see that you give value away. The incentive is to always make people think they are getting more for what they are paying for.  I personally love to see the looks on the winning person and to have them feel so excited to receive what great service you provide.

The type of clientele you will get from these top tips will create an abundance of revenue along with a well-respected staff and make for working in this career very gratifying. Your hairstylist will love working for you. Your clients will refer you and new clients will follow.